

I remember the first time I tried to make homemade fig bars. It was a Saturday, gray and rainy, and I was feeling nostalgic for those store-bought cookies from childhood. I had this vision of warm, chewy goodness, but my first attempt? Oh, hon, it was a crumbly, sticky mess! The kitchen looked like a flour bomb went off, and I swear there was fig paste on the ceiling. But the smell? Oh, that sweet, earthy aroma filled the house, and I knew I was onto something special, even if it looked like a disaster. This recipe, after many trials and errors (and a few more kitchen explosions), finally delivers that comforting, warm hug I was chasing. It’s simple, really, once you get the hang of it, and the taste is just... chef's kiss!
One time, I was so distracted by a podcast while rolling out the dough that I forgot to chill it. The result was a sticky, unmanageable nightmare that just melted into a puddle on the baking sheet. I stood there, hands covered in dough, just laughing at the sheer chaos. My dog, bless her heart, thought it was a new game. Lesson learned: chilling the dough is not optional, friends! It's a crucial step for these homemade fig bars, trust me on this one.
Ingredients
Fig Filling Goodness
- Dried Figs (Mission or Calimyrna): These are the heart of the homemade fig bars. I usually go for Mission figs, they're sweeter and have a deeper color, honestly. Don't cheap out here, good quality figs make all the difference. I once tried some old, dried-out ones from the back of the pantry, and the filling was just... sad.
- Water (or Orange Juice): You need this to rehydrate the figs. I often use just plain water, but a splash of orange juice adds a bright, citrusy note that really elevates the fig flavor. I didn't expect that to work so well, but it does!
- Granulated Sugar: Just a touch to sweeten the figs. Figs are already sweet, so don't overdo it. I like to keep it subtle so the fig flavor shines.
- Lemon Juice: A squeeze of fresh lemon juice really brightens up the fig filling and keeps it from being too sweet. I always add a bit more than the recipe calls for, because I love that zesty kick.
The Buttery Crust
- All-Purpose Flour: The foundation of our crust. Don't try to substitute with weird flours unless you're feeling adventurous and don't mind a potentially crumbly mess. I stick with AP, it's reliable.
- Granulated Sugar: For a little sweetness in the crust. It's not just about the filling, you know? The crust needs its moment too.
- Unsalted Butter (cold, cut into cubes): This is where the magic happens for a flaky crust. Seriously, keep it cold! I made the mistake of using slightly softened butter once, and the dough was a sticky nightmare. Learn from my "oops!" moments.
- Cold Water: Just enough to bring the dough together without making it tough. I usually add it a tablespoon at a time, because too much water is a recipe for disaster.
Finishing Touches
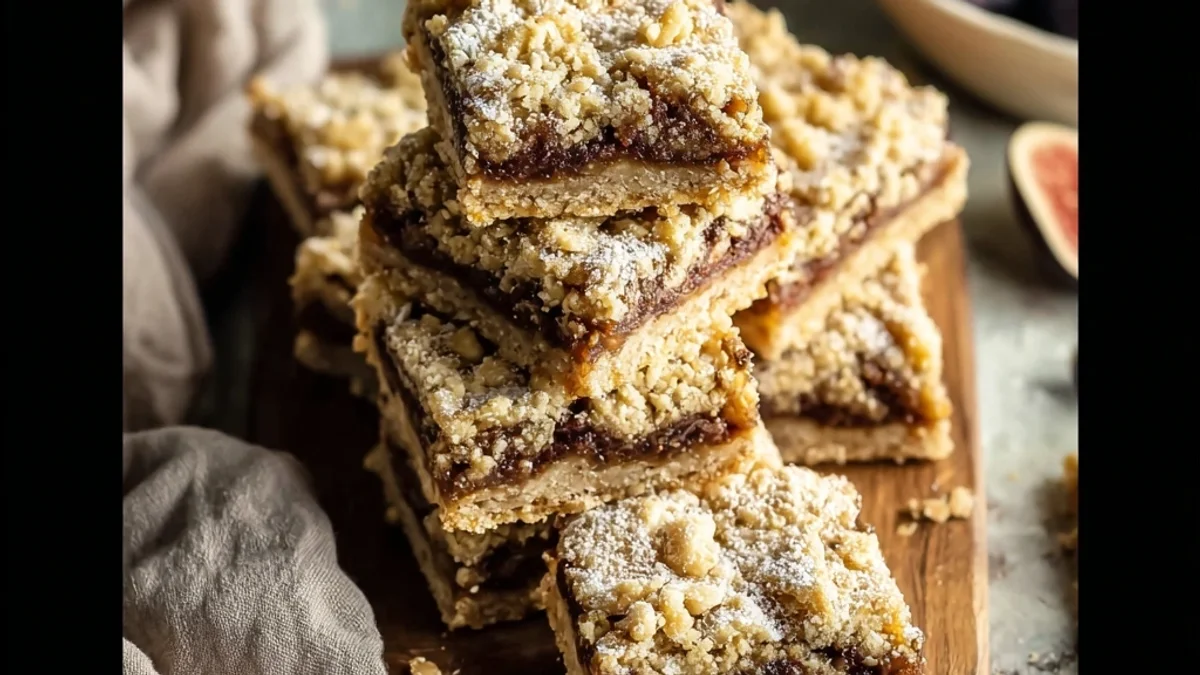
- Powdered Sugar (for dusting): Totally optional, but it makes these homemade fig bars look extra pretty and adds a delicate sweetness. I love how it looks like a dusting of snow.
Instructions
- Prepare the Fig Filling:
- First things first, let's get those figs ready. Chop your dried figs roughly and toss them into a small saucepan with the water (or orange juice), sugar, and lemon juice. Bring this mixture to a gentle simmer over medium heat. You’ll want to stir it occasionally, letting the figs soften and absorb that liquid. This usually takes about 10-15 minutes. The smell, oh my goodness, it’s already starting to smell like cozy autumn afternoons in my kitchen! Once they're plump and tender, remove from heat and let them cool a bit.
- Blend the Filling:
- Once the fig mixture has cooled down enough to handle, transfer it to a food processor. Give it a good pulse until you have a thick, spreadable paste. Now, here's a personal tip: I like my filling to have a little bit of texture, so I don't blend it until it's completely smooth. A few tiny fig pieces are a-okay! If it seems too thick, you can add a tiny splash more water, but honestly, it should be pretty dense. Set this deliciousness aside while we tackle the crust for our homemade fig bars.
- Make the Crust Dough:
- Time for the buttery goodness! In a large bowl, whisk together your all-purpose flour and granulated sugar. Now, add those cold, cubed unsalted butter pieces. Using a pastry blender or your fingertips, cut the butter into the flour mixture until it resembles coarse crumbs, with some pea-sized pieces remaining. This is where the flakiness comes from, so don't overmix! It's a bit messy, I know, but trust the process. You'll start to feel the butter breaking down, and it's quite satisfying.
- Form the Dough:
- Next, gradually add the cold water, one tablespoon at a time, mixing until the dough just comes together. Be careful not to add too much water, you want it to be cohesive but not sticky. I usually start with three tablespoons and add more only if needed. Overworking the dough is my nemesis, it makes for tough bars, and no one wants that! Once it forms a shaggy ball, divide the dough in half, flatten each half into a disc, wrap them in plastic, and chill in the fridge for at least 30 minutes. This step for homemade fig bars is crucial!
- Assemble the Fig Bars:
- Preheat your oven to 375°F (190°C) and line an 8x8 inch baking pan with parchment paper, leaving an overhang on the sides. On a lightly floured surface, roll out one disc of chilled dough into a rectangle, roughly 8x12 inches. Carefully transfer this dough to your prepared baking pan, pressing it gently into the bottom. Now, spread your fig filling evenly over the crust, leaving a small border. It smells incredible right now, doesn't it? This is where the magic starts to happen for our homemade fig bars.
- Bake and Finish:
- Roll out the second dough disc into another 8x12 inch rectangle. Place this second piece of dough gently over the fig filling, sealing the edges. You can crimp them with a fork if you want to be fancy. Bake for 25-30 minutes, or until the crust is golden brown and looks inviting. When it comes out, the whole kitchen will smell like pure comfort. Let it cool completely in the pan on a wire rack before lifting it out using the parchment paper overhang and slicing into those gorgeous homemade fig bars.
There’s something so satisfying about pulling these homemade fig bars out of the oven. That golden-brown crust, the sweet fig aroma wafting through the house… it always takes me back to that first chaotic attempt. Now, my kitchen might still get a little messy, but at least the bars actually come out looking like bars! It’s a messy joy, honestly, and worth every single crumb. I love sharing these, seeing friends' faces light up, it’s just pure happiness in a square.

Homemade Fig Bars: Storage Tips
So, you've made these delicious homemade fig bars, and now you're wondering how to keep them fresh. Honestly, they rarely last long enough for me to worry too much! But if you do have leftovers (lucky you!), store them in an airtight container at room temperature for up to 3-4 days. I tried putting them in the fridge once, and while they were fine, the crust got a little firmer than I prefer. If you want to keep them longer, they freeze beautifully! Just wrap individual bars tightly in plastic wrap, then place them in a freezer-safe bag for up to 2 months. Thaw at room temperature, or give them a quick zap in the microwave for a warm treat. Just don't microwave them for too long, or the filling can get super hot and explode a little learned that the hard way, oops!
Homemade Fig Bars: Ingredient Substitutions
I’m all about playing around with ingredients, and these homemade fig bars are pretty forgiving. If you don't have mission figs, any dried fig variety will work, though the flavor profile might shift a bit. I once tried using dried apricots instead of figs, and while it wasn't the classic fig bar, it was a surprisingly tangy and delicious twist it worked, kinda! For the crust, if you're out of all-purpose flour, a 1:1 gluten-free baking blend can sometimes work, but you might need to adjust the water slightly, as GF flours absorb liquid differently. I haven't perfected that swap yet, to be real. And if you're dairy-free, a good quality vegan butter substitute will work wonders in the crust. Just make sure it's very cold!
Serving Homemade Fig Bars
Oh, the ways to enjoy these homemade fig bars! My absolute favorite way to serve them is slightly warm, maybe with a tiny dollop of crème fraîche or a scoop of good vanilla bean ice cream. That warm-cold contrast? Chef's kiss! They're also fantastic on their own with a cup of strong black coffee in the morning honestly, it's my little secret breakfast indulgence. For an afternoon treat, pair them with a cup of Earl Grey tea. They’re also a hit at potlucks, easy to transport, and everyone loves a homemade treat. If you're feeling fancy, a drizzle of balsamic glaze over the top before serving adds a sophisticated touch that I didn't expect to love so much!
Cultural Backstory of Fig Bars
While these homemade fig bars might remind many of the classic Fig Newton, the concept of a fruit-filled pastry has roots that stretch back centuries across various cultures. Figs themselves are ancient, one of the first cultivated fruits, appearing in diets from the Mediterranean to the Middle East for millennia. The idea of preserving fruit in a pastry casing was a practical way to enjoy the harvest year-round. My connection to them feels less about ancient history and more about childhood nostalgia, but knowing their long lineage makes them feel even more special. It's like I'm baking a little piece of history right in my own kitchen, bringing that age-old comfort into a modern-day snack.
Honestly, these homemade fig bars have become such a comforting staple in my kitchen. From those early, messy experiments to the perfectly golden squares I make now, each batch feels like a little victory. They're more than just a snack, they're a sweet reminder of perseverance and the joy of creating something delicious with your own hands. I hope you give them a try and find as much joy in them as I do. Don't forget to share your own kitchen adventures with me!

FAQs about Homemade Fig Bars
- → Can I use fresh figs for these Homemade Fig Bars?
You know, I haven't had much luck with fresh figs in this particular recipe. They have a different moisture content and tend to make the filling too watery, which can mess with the crust. Stick to dried figs for the best results, trust me on this!
- → What if my fig filling is too thick or too thin?
If your filling for the homemade fig bars is too thick after blending, add a teaspoon of water at a time until it's spreadable. If it's too thin, you can simmer it gently on the stove for a few more minutes to reduce the liquid, but be careful not to burn it!
- → My dough is really sticky, what did I do wrong?
Oh, I've been there! Usually, sticky dough for homemade fig bars means your butter wasn't cold enough, or you added too much water. Try adding a tiny bit more flour, one tablespoon at a time, and really make sure your butter is chilled solid next time.
- → How long do Homemade Fig Bars last?
In my house, not long at all, haha! But honestly, stored in an airtight container at room temperature, these homemade fig bars will stay fresh for about 3-4 days. For longer storage, you can definitely freeze them for up to two months.
- → Can I add nuts to the fig filling?
Absolutely! I love adding a handful of finely chopped walnuts or pecans to the fig filling for extra texture and flavor. It adds a lovely crunch that I didn't expect to enjoy so much. Just fold them in after blending the figs.