

Honestly, I still remember the first time I tried to make a Pumpkin Pie Crisp. It was a chilly November evening, and I had this grand vision of a perfectly spiced, crunchy-topped dessert. What I actually ended up with was a slightly runny pumpkin layer and a crisp that, let's just say, was more "soggy" than "crispy." My kitchen was a disaster, flour everywhere, but the smell? Oh, the smell was still pure autumn magic. That first attempt might have been a bit of an oops, but the taste, even with its imperfections, was just so comforting. This dish, with its creamy pumpkin goodness and that glorious, crunchy oat topping, always brings me back to those warm, slightly chaotic fall evenings. It's special because it's pumpkin pie without the crust fuss, and who doesn't love that?
There was this one time, I was so focused on getting the spices just right for the Pumpkin Pie Crisp filling that I totally forgot to add the eggs. I didn't realize it until it was already baking, and I pulled it out to find a very... flat, albeit delicious-smelling, pumpkin layer. My husband still teases me about my "pumpkin pancake." Lesson learned: eggs are important, folks! But hey, even then, the flavor was still there, just with a different texture. We laughed, scooped it up, and honestly, it wasn't half bad, just not the crisp I was aiming for.
Ingredients
For the Creamy Pumpkin Filling
- Canned Pumpkin Puree: This is the heart of our Pumpkin Pie Crisp, the star of the show! Make sure it’s pure pumpkin, not pumpkin pie filling that stuff has added sugar and spices, and we want to control our own flavor journey, you know?
- Granulated Sugar: Balances the earthy pumpkin. I usually stick to the recipe, but if your pumpkin is super sweet, you can dial it back a tiny bit.
- Brown Sugar (lightly packed): Adds a deeper, molasses-y sweetness that just screams "fall." It really elevates the flavor profile, giving it that classic pumpkin pie depth.
- Large Eggs: These are our binders, giving the filling that smooth, custardy texture. Don't forget them, like I once did, unless you want a pumpkin pancake!
- Evaporated Milk: Honestly, this is a game-changer for creaminess. Don't use regular milk, it's just not the same. The richness is unparalleled.
For the Buttery Crisp Topping
- All-Purpose Flour: The base for our glorious crumble. I haven't tried gluten-free flour here, but I bet a 1:1 blend would work pretty well.
- Old-Fashioned Rolled Oats: These are what give our Pumpkin Pie Crisp that satisfying chew and rustic texture. Quick oats get too mushy, trust me.
- Cold Unsalted Butter (cubed): Keeping it cold is key for that crumbly, tender topping. I once used melted butter and it turned into a paste, not a crisp. Oops!
Spices &, Flavor Boosters
- Pumpkin Pie Spice: This blend is a shortcut to all those warm, cozy fall flavors. If you don't have it, a mix of cinnamon, nutmeg, ginger, and a pinch of cloves works beautifully. I always add a little extra cinnamon, just because.
- Vanilla Extract: A splash of vanilla just brightens everything up. Honestly, I think it makes the pumpkin flavor sing a little louder.
- Salt: Don't skip the salt! It balances the sweetness and makes all the other flavors pop. A tiny pinch makes a huge difference.
Finishing Touch
- Whipped Cream or Vanilla Ice Cream: Listen, this isn't optional for me. A warm Pumpkin Pie Crisp needs a cool, creamy contrast. It just feels right.
Instructions
- Prep the Oven and Dish:
- First things first, let's get that oven preheated to 375°F (190°C). While it's warming up, grab your 9x13 inch baking dish. I usually give mine a quick spray with non-stick cooking spray, just to be safe. There's nothing worse than a beautiful Pumpkin Pie Crisp sticking to the pan, is there? This little step honestly saves so much hassle later. You want to make sure your canvas is ready for the magic!
- Whip Up the Pumpkin Pie Crisp Filling:
- In a big bowl, whisk together your pumpkin puree, both sugars, eggs, evaporated milk, pumpkin pie spice, vanilla extract, and that tiny but mighty pinch of salt. Whisk it until everything is smooth and beautifully combined. You'll see it transform into this gorgeous, creamy orange mixture. Don't overmix, but do make sure there are no streaks of unmixed spices. Pour this luscious filling evenly into your prepared baking dish. It should smell amazing already, honestly.
- Craft the Crunchy Crisp Topping:
- Now for the best part! In another bowl, combine the flour, oats, more brown sugar, a little extra pumpkin pie spice, and another pinch of salt. Give it a good whisk to mix everything. Then, add your cold, cubed butter. This is where I usually get my hands dirty, literally! Use your fingertips to cut the butter into the dry ingredients until you have a crumbly mixture with pea-sized pieces of butter. This step is crucial for that fantastic crisp texture, so don't rush it!
- Assemble Your Pumpkin Pie Crisp:
- Carefully sprinkle that glorious, buttery oat topping evenly over the pumpkin filling in your baking dish. Try to get good coverage, but don't press it down too hard, we want air pockets for maximum crispness. I always try to make sure there are no huge clumps, just a nice, even layer. It’s starting to look like a real dessert, isn't it? My kitchen always smells incredible at this point, like autumn exploded.
- Bake to Golden Perfection:
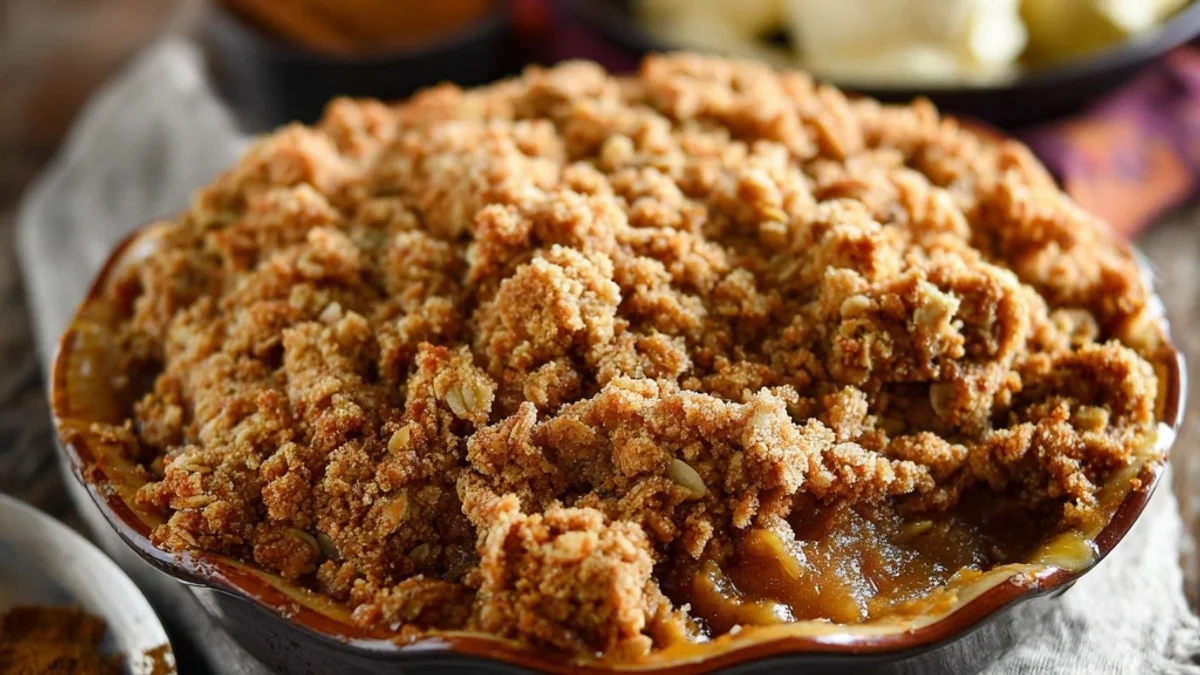
- Pop your assembled Pumpkin Pie Crisp into the preheated oven. Bake it for about 50-60 minutes. You're looking for the pumpkin filling to be set (a slight jiggle in the center is okay, but not sloshy!) and the topping to be beautifully golden brown and crunchy. If the topping starts to get too dark too quickly, you can loosely tent it with foil for the last 10-15 minutes. Every oven is a little different, so keep an eye on it!
- Cool and Serve Your Pumpkin Pie Crisp:
- Once it's baked, take it out of the oven and let it cool on a wire rack for at least 15-20 minutes. Honestly, it's tough to wait, but this allows the filling to set up a bit more and prevents it from being too runny when you scoop it. Serve it warm, with a generous dollop of whipped cream or a scoop of vanilla bean ice cream. That warm-cold contrast? Chef's kiss! You won't regret the wait, I promise.
I remember one time, I was trying to photograph this Pumpkin Pie Crisp for my blog, and my cat, Mittens, decided it was the perfect moment to jump onto the counter and sniff around. Of course, she knocked over my carefully arranged cinnamon stick garnish! Honestly, it was chaos, but it made for a pretty funny story later. Despite the minor mishap, the aroma filling the kitchen was just heavenly, a mix of warm spices and sweet pumpkin that just makes you feel all fuzzy inside.
Pumpkin Pie Crisp Storage Tips
Okay, so you've got leftover Pumpkin Pie Crisp, which honestly, is a rare occurrence in my house! Once it's completely cooled, cover the baking dish tightly with plastic wrap or transfer individual servings to airtight containers. I once just left it loosely covered, and the topping got a bit soft and lost its crunch so don't do that, lol. It holds up beautifully in the fridge for about 3-4 days. To reheat, you can pop a serving in the microwave for a minute or two, but my favorite way is to warm it in a low oven (around 300°F/150°C) for 10-15 minutes. This helps the topping regain some of its crispness. Freezing? I haven't tried it with the crisp topping, as I worry it might get too soggy upon thawing, so I usually just enjoy it fresh.

Pumpkin Pie Crisp Substitutions
I've experimented a bit with this Pumpkin Pie Crisp, mostly out of necessity! If you don't have evaporated milk, heavy cream can work, but the texture might be a little richer and less "pie-like." I tried using regular milk once, and honestly, it made the filling a bit too watery, so I wouldn't recommend it unless you're in a real pinch. For the crisp topping, if you're out of oats, a mix of chopped pecans or walnuts with some extra flour can make a delicious, nutty crumble. I've also used crushed gingersnaps for the topping, which gave a fun, spicy kick you should totally try it if you love ginger! Just remember that substitutions can change the texture and flavor, so embrace the adventure!
Serving Your Pumpkin Pie Crisp
Oh, serving this Pumpkin Pie Crisp is where the real fun begins! My absolute favorite way is warm, straight from the oven (after it's had a moment to cool, of course) with a generous scoop of good quality vanilla bean ice cream. The way the ice cream melts into the warm, spiced pumpkin? Pure bliss, honestly. A cloud of freshly whipped cream is also a fantastic choice, especially if you add a tiny dash of cinnamon to it. For a truly cozy evening, I love serving this with a hot mug of spiced cider or a creamy chai latte. This dish and a good book on a rainy afternoon? Yes please! It's comforting, it's sweet, and it just makes you feel good.
Cultural Backstory of Pumpkin Pie Crisp
Pumpkin desserts, especially in the form of pies, have a long and storied history in American culture, particularly around harvest time and holidays like Thanksgiving. While the classic pumpkin pie dates back centuries, the "crisp" or "crumble" variation is a more modern, casual take, offering all the beloved flavors without the fuss of a traditional pie crust. For me, this Pumpkin Pie Crisp reminds me of growing up, when my grandma would always make a pumpkin dessert, but sometimes the crust was a bit intimidating for us younger bakers. This crisp feels like a warm, inviting evolution of that tradition familiar, comforting, but with a wonderfully easy, crunchy twist. It’s about celebrating fall flavors in a way that feels both classic and wonderfully approachable.
Making this Pumpkin Pie Crisp always fills my kitchen with the most wonderful, comforting smells. It’s a dish that just feels like home, a little bit messy, a little bit sweet, and full of warmth. Every time I pull it from the oven, golden and bubbling, I get a little sentimental. It’s more than just a dessert, it’s a moment of pure, unadulterated fall joy. I really hope you give this a try and make it your own. Let me know how your kitchen adventures turn out I love hearing your versions!

Frequently Asked Questions
- → Why is my Pumpkin Pie Crisp filling runny?
Honestly, it could be a few things! Maybe your eggs were forgotten (oops, I've done that!), or it just needed a little more bake time. Make sure it has a slight jiggle, but isn't sloshy, when you take it out!
- → Can I use gluten-free oats for this Pumpkin Pie Crisp?
Yes, you totally can! I haven't personally tried it, but gluten-free old-fashioned rolled oats should work just fine in the crisp topping. Just make sure they're certified GF if it's a strict dietary need.
- → How do I get a really crunchy topping for my Pumpkin Pie Crisp?
The secret, hon, is cold butter and not overmixing! Use your fingertips to work the butter into the dry ingredients until it's just crumbly. Also, don't press it down too hard when you sprinkle it on the filling.
- → How long does Pumpkin Pie Crisp last in the fridge?
Once it's completely cooled, your Pumpkin Pie Crisp will keep well in an airtight container in the fridge for about 3-4 days. Reheating it in a low oven helps to crisp up the topping again!
- → Can I add nuts to the Pumpkin Pie Crisp topping?
Absolutely! Chopped pecans or walnuts would be a fantastic addition to the crisp topping. I'd stir them in with the oats and flour before adding the butter. It adds a lovely extra crunch and flavor!