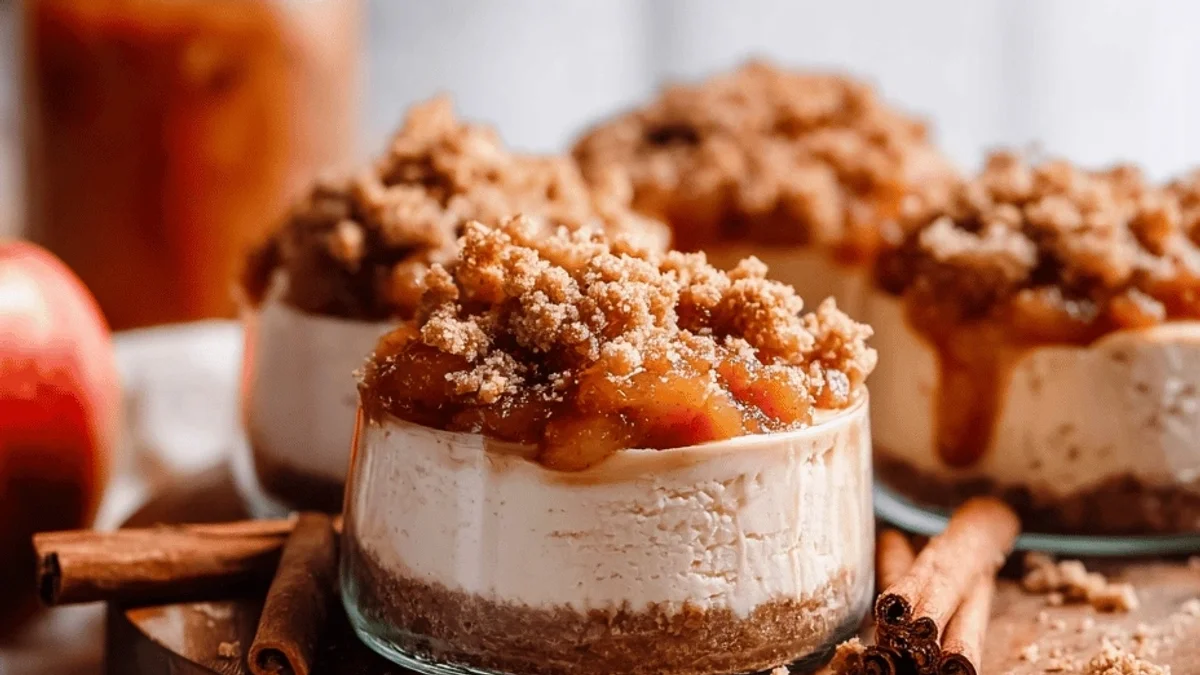


I remember one scorcher of a summer afternoon, the kind where the air shimmered and even the thought of turning on the oven felt like an act of pure defiance. Yet, a craving for something comforting, something that whispered 'autumn afternoon' and 'warm kitchen hug', just wouldn't leave me alone. Apple pie, in all its glory, was out of the question. But then, a little spark, a tiny flicker of an idea, danced in my mind: what if I could capture that cozy apple pie feeling, but keep it cool, creamy, and utterly effortless? That's when these mini no-bake apple pie cheesecakes were born, honestly. They became my little secret weapon against the heat, a sweet promise of comfort without a single bead of sweat. There's something so wonderfully elegant, yet delightfully unfussy, about individual desserts. No slicing, no fuss, just a perfect little portion of joy, waiting to be devoured. It's like a tiny, edible masterpiece, if I do say so myself. This recipe is a testament to those moments when you want something special, but life (and the weather!) just isn't cooperating with grand culinary adventures. It’s all about finding that sweet spot between yearning and ease, and honestly, these cheesecakes hit it perfectly every single time.
The first time I made these, I got a little overzealous pressing the graham cracker crust into the muffin liners. Oops! It turned out more like a solid biscuit base than a delicate crust, and my family lovingly (and loudly!) teased me. But hey, it was still delicious, just a bit of a workout for the jaw! We all had a good laugh, and now I know to be gentle.
Ingredients
- For the Crust: You’ll need a pack of crushed graham crackers, of course. This is your foundation, your cozy little bed for all that creamy goodness. Honestly, don't skimp here; it's the perfect sweet crunch. Melted unsalted butter to bind it all together. It's magic, honestly, how butter makes everything stick just right.
- For the Creamy Filling: Two blocks of full-fat cream cheese, softened. And when I say softened, I mean truly room temperature. I once tried rushing it, and oh, the lumps! Just don't do it. Granulated sugar, because sweet is good, right? A little vanilla extract, for that classic comforting taste. And a splash of heavy cream, this is where the magic happens, giving it that luxurious, dreamy texture.
- For the Apple Topping: Two crisp apples, peeled, cored, and finely diced. I usually go for Honeycrisp or Fuji; they hold their shape beautifully and offer a lovely tart-sweet balance. A couple of tablespoons of unsalted butter for sautéing, and a bit of brown sugar to caramelize those apple bits. It makes them so tender and fragrant.
- Flavor Boosters: Ground cinnamon, a generous amount, because what's apple pie without it? A tiny pinch of nutmeg and a whisper of ground cloves these are the secret ingredients that elevate it from 'good' to 'oh-my-goodness-what-is-this?!'. I sometimes add a tiny dash more cinnamon than the recipe calls for, just because I adore that warm spice.
 Pin it
Instructions
- Step 1: Prep the Crusts
- First things first, line a 12-cup muffin tin with paper liners. Honestly, this makes removal so much easier later. In a medium bowl, combine your crushed graham crackers and the melted butter. Give it a good stir until it all looks like wet sand. Now, spoon about 1-2 tablespoons of this mixture into the bottom of each liner. Gently, and I mean gently, press it down with the back of a spoon or your fingertips. Remember my 'brick crust' oops moment! This step lays the groundwork for that perfect crunch at the bottom. The smell of graham cracker and butter... oh, it's just the start of something lovely.
- Step 2: Start the Apple Topping
- Time for the star of the show, the apples! In a small saucepan, melt a tablespoon of butter over medium heat. Add your finely diced apples, brown sugar, and a generous sprinkle of ground cinnamon, nutmeg, and cloves. Cook, stirring occasionally, until the apples are tender but still have a little bite, about 5-7 minutes. You want them to soften and smell absolutely incredible, filling your kitchen with that warm, spicy aroma. This is where your house starts to smell like autumn, even if it's 90 degrees outside. Let them cool completely; this is crucial, hon, we don't want warm apples melting our creamy filling.
- Step 3: Make the Creamy Filling
- In a large bowl, beat your softened cream cheese and granulated sugar together until it's wonderfully smooth and creamy. Use an electric mixer if you have one; it makes it so much easier. Then, gently beat in the vanilla extract and the heavy cream until everything is light, fluffy, and perfectly combined. This is the heart of your cheesecake, so make sure it's lump-free and lusciously smooth. I always taste a tiny bit here, just to check for sweetness, you know, for quality control! It should be airy and dreamy.
- Step 4: Assemble the Cheesecakes
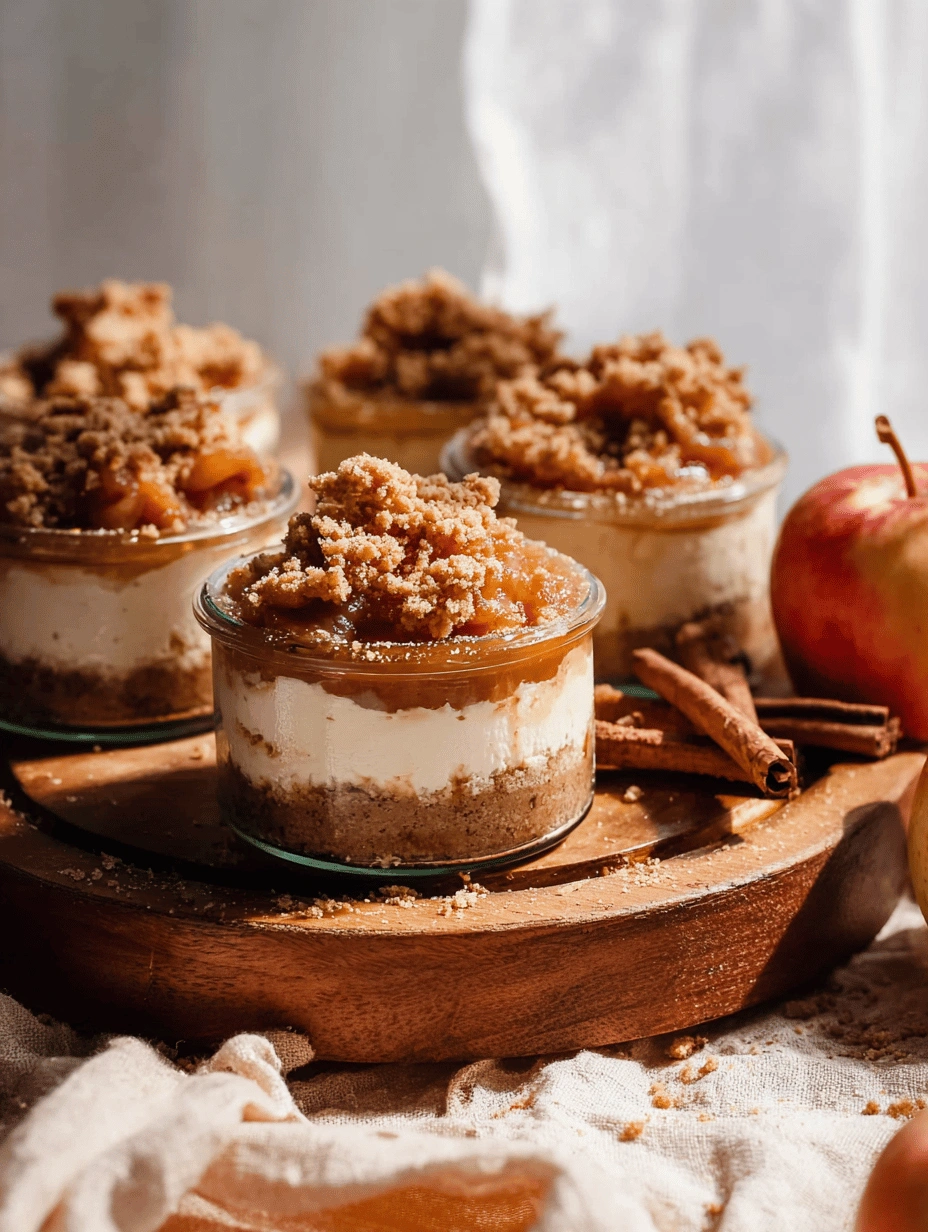
- Now for the fun part: assembly! Spoon or pipe your creamy cheesecake filling over the graham cracker crusts in each muffin liner. Fill them almost to the top. Use an offset spatula or the back of a spoon to smooth out the tops. They should look neat and inviting. This is where you see your vision starting to come to life, those little white mounds ready for their crowning glory. Take your time, don't rush it; presentation matters, even for a no-bake treat. I sometimes get a little messy here, but hey, it's homemade, right?
- Step 5: Chill Out!
- Once all your mini cheesecakes are assembled, it's time for the hardest part: waiting! Place the muffin tin in the refrigerator and chill them for at least 4 hours, or even better, overnight. This chilling time is absolutely vital for the cheesecakes to set properly and become firm. I know, I know, it's tough to wait when they look so tempting, but trust me, it's worth it. A properly chilled cheesecake is a joy to behold and to eat. I’ve tried to rush this once, and they were a little too soft still delicious, but not quite perfect.
- Step 6: Top and Serve
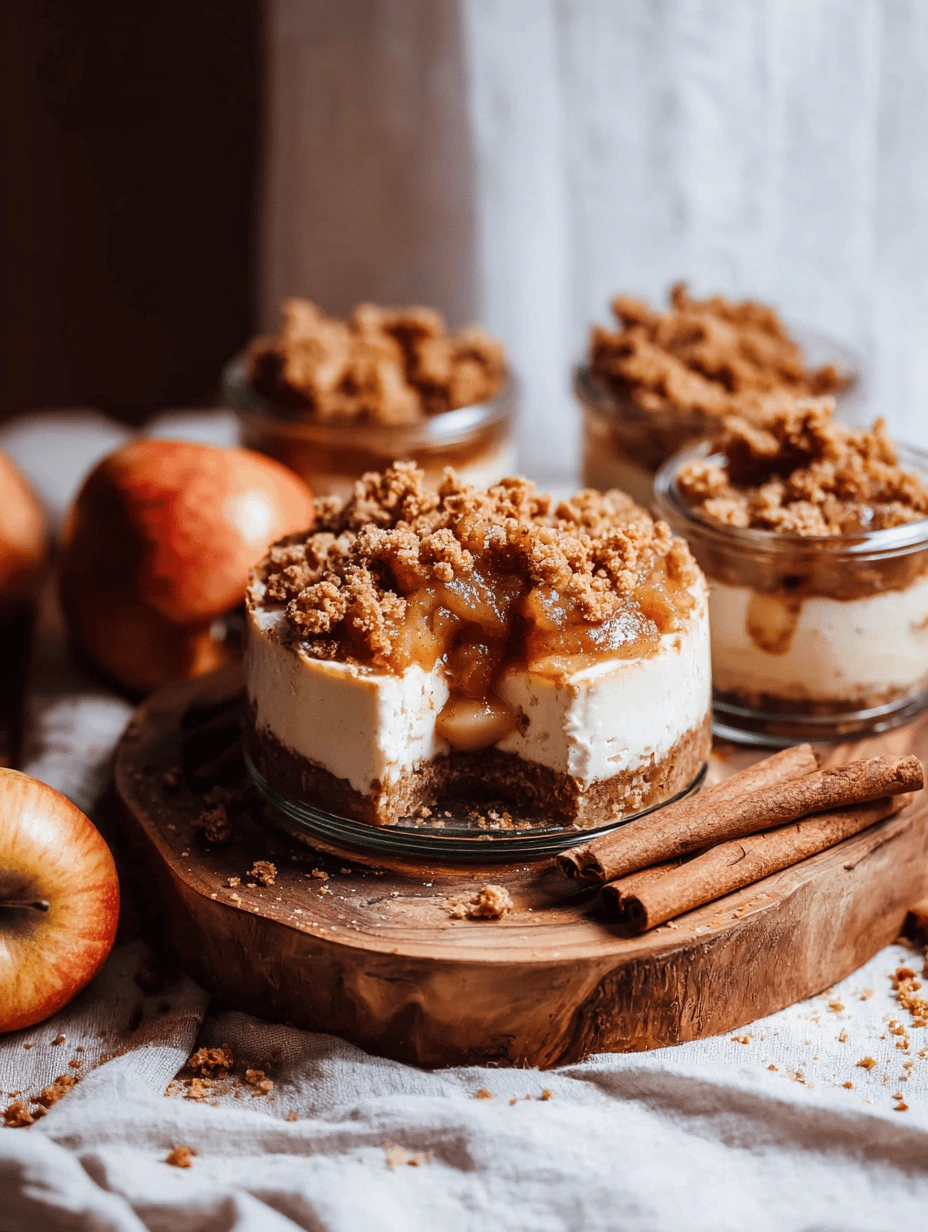
- When your cheesecakes are beautifully set, carefully remove them from the muffin tin by lifting the paper liners. Now, spoon a generous dollop of your cooled apple topping over the top of each cheesecake. You can arrange the apples artfully or just pile them on, whatever your heart desires. A little extra sprinkle of cinnamon on top is never a bad idea. And there you have it, ready to impress! The creamy, cool cheesecake against the warm, spiced apples is just chef's kiss perfection. Enjoy!
There was this one time, mid-assembly, my little one decided the graham cracker crumbs were confetti. So, yeah, we had a delightful glitter-bomb of crumbs all over the kitchen floor. It was chaotic, but honestly, it just added to the charm of making these. We laughed, cleaned up, and still ended up with perfect little cheesecakes.
Storage Tips
These mini no-bake cheesecakes are best stored in an airtight container in the refrigerator. They’ll keep beautifully for up to 3-4 days, though honestly, they rarely last that long in my house! I wouldn't recommend freezing them once assembled with the apple topping, as the texture of both the cream cheese and the apples can get a bit odd upon thawing a bit watery and grainy, which is a real shame. If you're planning ahead, you can make the cheesecake bases a day or two in advance and store them, then make the apple topping fresh right before serving for the best texture and flavor. I once microwaved a leftover one just for kicks, and the filling definitely separated, so don't do that lol. Keep them cool and covered, and they'll be delicious whenever you crave a little sweet bite.
Ingredient Substitutions
Oh, the fun of experimenting! For the crust, if graham crackers aren't your jam, try crushed digestive biscuits, vanilla wafers, or even shortbread cookies. I've used vanilla wafers before, and it gave it a lovely, almost custardy undertone it worked, kinda, just a different vibe! As for the apples, feel free to play around with different varieties. Granny Smith apples would give you a tarter bite, which some people absolutely adore. If you don't have heavy cream, you could try full-fat coconut cream (the thick part from a can of chilled coconut milk), but the texture might be slightly different. And if you're out of one of the spices, cinnamon is the most crucial, but feel free to adjust the nutmeg and cloves to your liking or even omit them if you're not a fan. I sometimes add a tiny dash of allspice too, just to shake things up a little.
Serving Suggestions
These mini cheesecakes are pretty perfect all on their own, but if you want to elevate the experience, I've got a few ideas! A tiny dollop of whipped cream on top, perhaps with a sprinkle of extra cinnamon or a delicate grating of fresh nutmeg, adds an extra layer of decadence. They pair wonderfully with a hot cup of black tea or a creamy latte for an afternoon treat. For an after-dinner delight, a small glass of sparkling cider or even just some plain sparkling water with a lemon slice would be lovely. And honestly, for a cozy night in, these cheesecakes with a warm, fuzzy blanket and your favorite rom-com? Yes please. They’re perfect for any occasion that calls for a little bit of sweet, comforting joy.
 Pin it
Cultural Backstory
Cheesecake, in its many forms, has been around for centuries, tracing its roots back to ancient Greece! It's evolved from a simple cake of cheese and honey to the rich, creamy dessert we know today. Apple pie, on the other hand, is quintessentially American, though its origins lie in England. It evokes images of warm kitchens and family gatherings. When I discovered the idea of combining the two, especially in a no-bake mini version, it felt like taking two beloved comfort foods and giving them a modern, fuss-free twist. It's not about historical accuracy, but about taking those familiar, comforting flavors and reimagining them for a busy life. For me, it became a way to honor those cozy, nostalgic feelings of home without needing hours in the kitchen. It’s a little slice of culinary history, made new and personal.
And there you have it, sweet friends. These mini no-bake apple pie cheesecakes are more than just a dessert; they’re a little moment of joy, a taste of comfort without all the fuss. They turned out just as dreamy and creamy as I’d hoped, with that perfect spiced apple topping. I hope you give them a try for your next craving, or when you just need a little sweet pick-me-up. I'd love to hear how your version turns out, so do share your kitchen adventures with me!
Frequently Asked Questions
- → Can I use a different type of cookie for the crust?
-
Absolutely! I've experimented with vanilla wafers and even shortbread cookies. They give a slightly different flavor profile, but they work beautifully. Just make sure to crush them finely and combine with melted butter, just like with graham crackers.
- → What if my cream cheese isn't soft enough?
-
Oh, the dreaded lumpy filling! If your cream cheese isn't at room temperature, it won't mix smoothly. You can try microwaving it for 10-15 seconds at a time (no more!) or submerging the wrapped blocks in warm water for 15-20 minutes. Just don't overheat it!
- → Can I make the apple topping ahead of time?
-
Yes, you absolutely can! Make the apple topping a day or two in advance and store it in an airtight container in the refrigerator. Just make sure it's completely cooled before you put it on the cheesecakes. This saves a little time on assembly day.
- → How do I get the cheesecakes out of the muffin tin easily?
-
Using paper liners is key! Once they're fully chilled, just gently lift each cheesecake out by pulling up on the paper liner. If you didn't use liners, you might need to run a thin knife around the edges before attempting to remove them.
- → Can I add other spices to the apple topping?
-
Please do! I often add a tiny pinch of allspice or even a whisper of ginger for an extra layer of warmth. Experiment a little; find what flavors sing to your soul! It's your kitchen, after all, have some fun with it.