

You know, making pie crust used to be my kitchen nemesis. Honestly, for years, my pie crusts were more like dense, crumbly hockey pucks than the tender, flaky dreams I pictured. I’d try, I’d fail, I’d sigh dramatically. Then, during one particularly disastrous holiday baking session, my grandma, bless her heart, pulled me aside. "Emilia," she said, "it's all in the butter and the chill." She showed me her way, and it changed everything. This isn't just a recipe, it's a memory, a turning point, and the secret to a truly Flaky Butter Pie Crust that actually works. The smell of cold butter and flour coming together still reminds me of that afternoon, a little chaotic, a little messy, but full of warmth.
I remember the first time I tried grandma’s method. I was so nervous, my kitchen counter was covered in flour, and I might have accidentally added a full tablespoon of salt instead of a teaspoon. Oops! Luckily, I caught it before adding the water, but for a moment, I thought I’d ruined it. It’s funny how those little mistakes stick with you, but they also teach you to pay attention, right? That first truly Flaky Butter Pie Crust, even with my near-disaster, was a revelation.
Ingredients for a Flaky Butter Pie Crust
- All-Purpose Flour: This is our foundation, the canvas for our Flaky Butter Pie Crust. Don't go for anything fancy here, regular all-purpose is perfect. I once tried whole wheat, and while it was... rustic, it wasn't the tender dream I was going for. Stick with the tried and true!
- Granulated Sugar: Just a tiny bit, honestly, for flavor and browning. It helps tenderize the dough a touch. I know some recipes skip it, but I swear by this little secret for a slightly richer, more golden crust. Don't overdo it, though!
- Fine Sea Salt: A pinch, but a crucial pinch! It brings out all the buttery goodness. I'm a bit heavy-handed with salt in most things, but with pie crust, a balanced hand is key. Too much and it's just... salty pie. Not ideal.
- Unsalted Butter, very cold: This is the star of our Flaky Butter Pie Crust show! Seriously, use unsalted so you control the salt content, and it has to be ice cold, cut into cubes. I’ve tried using slightly softened butter in a pinch, and let me tell you, it melts too fast, and you end up with a tough, sad crust. Don’t do it!
- Ice Water: Your magic liquid. The colder, the better. I literally add ice cubes to a measuring cup of water and let it sit for a few minutes before using. This keeps the butter from melting prematurely, which is essential for those beautiful flaky layers.
- Apple Cider Vinegar (or vodka), very cold: My little secret weapon! Honestly, I didn't expect this to work, but it helps tenderize the dough by inhibiting gluten development without adding any noticeable flavor. I once forgot it, and the crust was still good, but not quite as tender.
Crafting Your Flaky Butter Pie Crust
- Combine Dry Ingredients:
- First things first, grab your biggest mixing bowl. Toss in the flour, sugar, and salt. Give it a good whisk until everything is super well combined. I always imagine I'm mixing a little cloud of deliciousness here. This step feels simple, but it’s where you ensure every bite of your Flaky Butter Pie Crust has even seasoning. Don't rush it, just a minute or so is perfect.
- Cut in the Butter:
- Now for the fun, or sometimes messy, part! Add your super cold, cubed butter to the dry ingredients. Use a pastry blender, two knives, or even your fingertips (if they're cold!) to cut the butter into the flour mixture. You're looking for pea-sized pieces, with some even smaller, like coarse sand. This is where the flakiness of your Flaky Butter Pie Crust comes from, so don't overmix! I’ve definitely overmixed here and ended up with a less flaky result, oops.
- Add the Liquids:
- Drizzle in the ice water, starting with the smaller amount, and then the cold apple cider vinegar. Mix gently with a fork or your hands until the dough just barely comes together. It should still look a little shaggy, not like a smooth ball. You might need an extra tablespoon or two of water, but add it slowly, like you're coaxing a shy kitten. The goal is just enough moisture for the dough to hold its shape, not to make it wet. This is where I always get nervous about adding too much water!
- Form and Chill the Discs:
- Turn the shaggy dough out onto a lightly floured surface. Gently gather it into a ball, then divide it in half. Flatten each half into a disc, about an inch thick. Wrap each disc tightly in plastic wrap. This step is crucial for developing the gluten and hydrating the flour, leading to a tender Flaky Butter Pie Crust. Pop them into the fridge for at least 30 minutes, or even better, an hour or two. Chilling is your friend, trust me!
- Roll Out the Dough:
- When you’re ready to bake, take one disc out of the fridge and let it sit for about 5-10 minutes just enough to make it pliable but still very cold. Lightly flour your work surface and your rolling pin. Roll the dough from the center outwards, rotating it frequently, until it's about 1/8-inch thick and large enough for your pie plate. I always aim for a circle a couple of inches wider than my pie plate. Don't be afraid to patch up any little tears, it happens to the best of us!
- Transfer to Pie Plate and Bake:
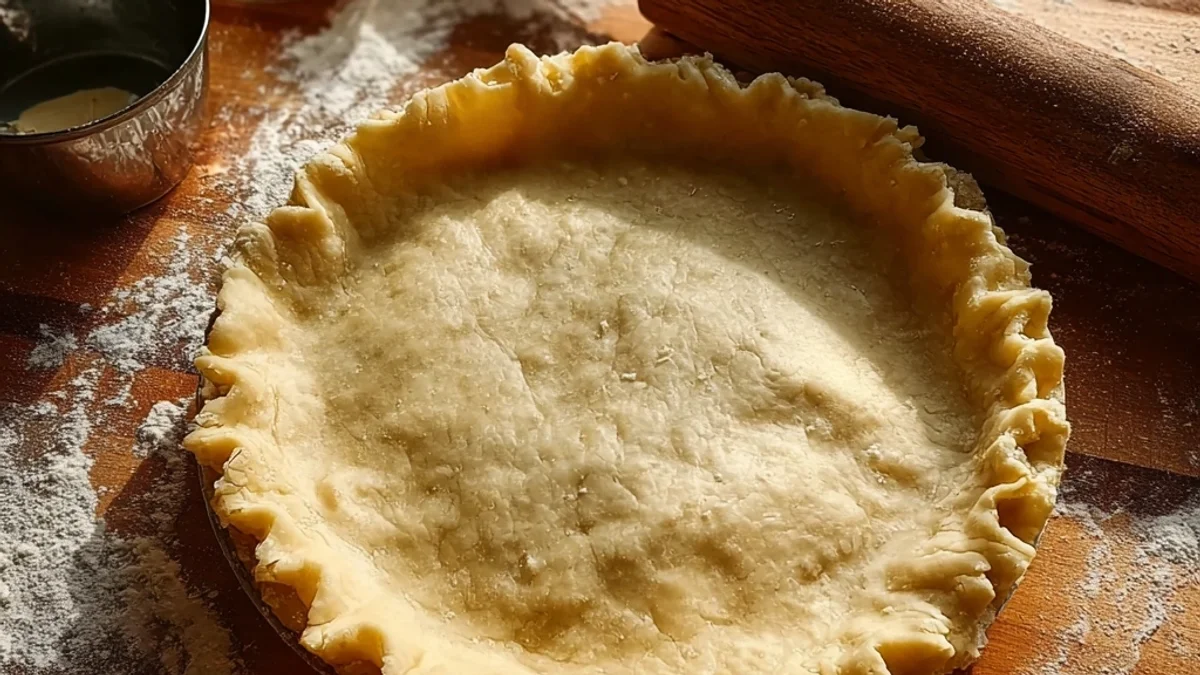
- Carefully transfer the rolled dough to your pie plate. You can gently fold it in half or quarters, then unfold it in the plate. Trim the edges, leaving about an inch of overhang, then crimp or flute the edges as you like. If you're blind baking, prick the bottom with a fork, line with parchment, and fill with pie weights. Bake according to your pie recipe. The smell of that buttery crust baking? Pure heaven! This Flaky Butter Pie Crust will make any pie shine.
Honestly, the first time my Flaky Butter Pie Crust came out of the oven golden and tender, I almost teared up a little. It was such a journey to get there, full of flour explosions and frantic calls to grandma. But that moment, smelling the rich butter and seeing those delicate layers, made every single kitchen mess worth it. It’s funny how a simple recipe can hold so much personal triumph, isn't it?
Storing Your Flaky Butter Pie Crust
Okay, so you’ve made a batch of this glorious Flaky Butter Pie Crust, maybe even a double batch because you’re smart like that! Unbaked pie dough is actually pretty forgiving for storage. I usually wrap my discs super tightly in plastic wrap, then pop them into a ziptop bag, squeezing out all the air. They’ll keep beautifully in the fridge for up to 2 days. If I'm thinking further ahead, I'll freeze them. Again, tightly wrapped, they’re good for about a month. When you’re ready to use a frozen disc, just let it thaw in the fridge overnight, then bring it to room temperature for about 10-15 minutes before rolling. I once tried to roll a rock-solid frozen disc, and let's just say my rolling pin almost didn't make it. Learn from my mistakes, lol!

Flaky Butter Pie Crust: Ingredient Swaps
Life happens, and sometimes you don't have exactly what the recipe calls for. I get it! For the flour, I've stuck with all-purpose because it gives the best Flaky Butter Pie Crust, but if you're feeling adventurous, a small percentage of pastry flour (maybe 1/4 cup) can make it even more tender. As for the butter, I always use unsalted, but if you only have salted, just reduce the added salt by about a quarter teaspoon. I tried using a mix of butter and shortening once, and while it was flaky, it lacked that rich, buttery flavor I adore. So, if you want that pure butter taste, stick with all butter! And for the apple cider vinegar, if you don't have it, a small splash of vodka works wonders for tenderizing without flavor. I promise, the alcohol bakes out!
Serving Ideas with Flaky Butter Pie Crust
This isn't just a crust, it's the foundation for so many delicious memories! Obviously, it's perfect for sweet pies apple, cherry, pumpkin, you name it. A warm slice of Flaky Butter Pie Crust apple pie with a scoop of vanilla bean ice cream? That’s my idea of a perfect Sunday afternoon. But don't forget savory! This crust makes the most incredible chicken pot pie, quiches, or even a hearty shepherd's pie topping. For a quick treat, I sometimes bake off little scraps with a sprinkle of cinnamon sugar. Serve your sweet pies with a strong cup of coffee or a glass of chilled milk. For savory, a crisp green salad always complements it beautifully. Honestly, it’s versatile enough for any mood or occasion!
Cultural Backstory of Pie Crusts
You know, pie crusts, especially a good Flaky Butter Pie Crust, feel so inherently American, but their story goes way back! Early pies, often called "coffins," were more about preserving the filling than eating the crust. They were thick, hard, and not very tasty, acting like a cooking vessel. It wasn't until much later, especially in Europe, that bakers started focusing on making the crust edible and, dare I say, delicious! The French pâtissiers really perfected the art of delicate pastry. For me, this particular Flaky Butter Pie Crust recipe feels like a blend of that European tradition with my grandma’s pragmatic American baking wisdom. It's a reminder that even simple ingredients have a rich history, evolving over centuries to become the comforting staple we love today.
So there you have it, my little piece of kitchen wisdom, passed down and tweaked over many flour-dusted afternoons. This Flaky Butter Pie Crust isn't just a recipe, it's a testament to patience, a little bit of science, and a whole lot of love. I hope it brings as much joy to your kitchen as it has to mine. Seriously, give it a try, and let me know how your pie adventures turn out!

Frequently Asked Questions about Flaky Butter Pie Crust
- → Can I make this Flaky Butter Pie Crust in a food processor?
Absolutely! I've done it many times, especially when I'm short on time. Just pulse the dry ingredients, then add the cold butter and pulse until pea-sized. Then, drizzle in the liquids while pulsing until it just comes together. Don't overmix!
- → What if my butter gets too warm while I'm working with the dough?
Oh, that happens to me all the time, especially on hot days! If your butter starts to melt and the dough feels sticky, just pop the whole thing back into the fridge for 15-20 minutes. A chilled dough is a happy dough, ready for a truly Flaky Butter Pie Crust.
- → Why do you recommend apple cider vinegar for this Flaky Butter Pie Crust?
It's my secret weapon for tenderness! The acidity helps inhibit gluten development, making the crust more delicate and less tough. You won't taste it, I promise! I learned this trick from an old baking book, and it really does make a difference.
- → How long can I blind bake the crust before filling?
For a fully blind-baked Flaky Butter Pie Crust, I usually bake it until it's golden brown, about 15-20 minutes with weights, then another 5-10 minutes without. You can do this a day ahead and store it loosely covered at room temperature. It saves so much time!
- → Can I make mini pies with this Flaky Butter Pie Crust dough?
Yes, please do! This dough is fantastic for mini pies, tarts, or even little hand pies. Just roll it out and use cookie cutters or a glass to make smaller circles. Adjust baking times accordingly they'll bake faster, of course!