

My kitchen smells like warm cinnamon and baked apples, and honestly, it takes me right back to my grandma’s farm. I first stumbled upon the idea of making apple hand pies one autumn when I was, let's just say, attempting to bake a full apple pie. It was a glorious mess, crust everywhere, filling bubbling over. My grandma just chuckled and handed me a small piece of dough, "Try making a little pocket, sweetie." And just like that, the vision for these individual, comforting treats was born. They’re less intimidating, incredibly satisfying, and have that homemade charm that makes you feel, well, hugged. No fancy pie dishes needed, just pure, unadulterated apple goodness.
I remember one time, in my haste, I forgot to chill the pie dough properly. Oops! The crust was sticky, tearing, and I almost gave up. My counter was covered in flour and frustration. But I pushed through, patching up the little pockets as best I could. They came out a little rustic, a little lopsided, but oh my goodness, the flavor was still spot-on. It just goes to show, kitchen mishaps often lead to charmingly imperfect, delicious results. Embrace the chaos, I say!
Ingredients for Easy Apple Hand Pies
- All-Purpose Flour: This is the backbone of our flaky crust! Don't skimp on quality here, it makes a difference. I once tried a weird whole wheat blend, and the texture was just... off. Stick to good old AP for these apple hand pies.
- Unsalted Butter: Cold, cold, cold! This is non-negotiable for a truly flaky crust. I've definitely made the mistake of using slightly soft butter, and the result was a sad, crumbly mess instead of delicate layers. Keep it cubed and in the fridge until the last second.
- Granny Smith Apples: Their tartness is key to balancing the sweetness of the filling. Honestly, other apples can work, but for me, Granny Smiths are the star. I tried Gala once, and it was just too sweet, losing that essential tang.
- Brown Sugar: Adds a lovely caramel note to our apple filling. You can adjust the amount based on how sweet your apples are or your personal preference. I often add a tiny bit more if my apples aren't super tart.
- Ground Cinnamon & Nutmeg: These are the warm, comforting spices that make the filling sing. Don't be shy with the cinnamon! I sometimes add a tiny pinch of cardamom for an extra layer of warmth, it works surprisingly well.
- Lemon Juice: A splash brightens the apple flavor and prevents browning. It's a small detail, but it makes a big difference in the overall freshness of the filling.
- Egg: Just one for an egg wash, giving our pies that beautiful golden sheen. It makes them look so professional, even if your kitchen looks like a flour explosion happened.
- Turbinado Sugar (for sprinkling): Adds a lovely crunch and sparkle to the tops. I didn't think it mattered much at first, but that extra texture is just delightful.
Crafting Your Apple Hand Pies
- Prepare the Dough:
- First things first, let's get that pie dough ready. If you're using store-bought, awesome, skip ahead a bit! If you're making it from scratch (which I encourage!), combine your flour and salt in a big bowl. Then, cut in that super cold, cubed butter. You want pea-sized pieces, not fully incorporated. I usually use my fingers, feeling the texture change, sometimes getting a little messy. This is where the magic of flakiness begins, so take your time. Then, slowly add ice water, just until the dough comes together. Don't overmix, that's a common mistake! Form it into two discs, wrap 'em up, and chill for at least 30 minutes. Honestly, I often forget this step and pay for it later with sticky dough.
- Make the Apple Filling:
- While your dough is chilling, it's filling time! Peel, core, and dice your Granny Smith apples into small, uniform pieces. This helps them cook evenly. Toss them in a bowl with brown sugar, cinnamon, nutmeg, and that splash of lemon juice. Give it a good stir. I like to let it sit for a few minutes, allowing the apples to release some of their juices and the spices to really meld. You'll smell that lovely apple-cinnamon aroma already starting to develop, and it's just wonderful. Sometimes I add a tiny dash of vanilla extract here too, just because.
- Roll and Cut the Dough:
- Now for the fun part! On a lightly floured surface, roll out one of your chilled dough discs into a roughly 1/8-inch thick rectangle. I usually aim for something around 10x14 inches, but don't stress about perfection. Then, using a sharp knife or a pastry wheel, cut out rectangles, about 4x5 inches. You should get about 6-8 rectangles per disc. This is where my kitchen often gets a little floury, but hey, that's part of the baking charm! Gather any scraps, re-roll, and cut more if you can. Keep the dough cool, if it gets too warm, pop it back in the fridge for a few minutes.
- Fill Your Apple Hand Pies:
- Time to fill these little beauties! Place a spoonful or two of your apple filling onto one half of each dough rectangle, leaving a small border around the edges. Don't overfill, or they'll burst open during baking I've learned this the hard way! My first few attempts always had way too much apple. Then, gently fold the other half of the dough over the filling, lining up the edges. Use your fingers to press down firmly around the edges, sealing the pie. This is where you can get creative with a fork to crimp the edges, giving it that classic pie look. It's so satisfying to see them take shape!
- Egg Wash and Venting:
- Once your apple hand pies are sealed, place them on a baking sheet lined with parchment paper. In a small bowl, whisk that egg with a tablespoon of water to create an egg wash. Brush the tops of each hand pie generously with the egg wash this gives them that beautiful golden, slightly shiny finish. Then, using a sharp knife, cut a few small slits in the top of each pie. This allows steam to escape during baking, preventing those messy blowouts. I sometimes make little patterns, just for fun. It’s like giving each pie its own little personality!
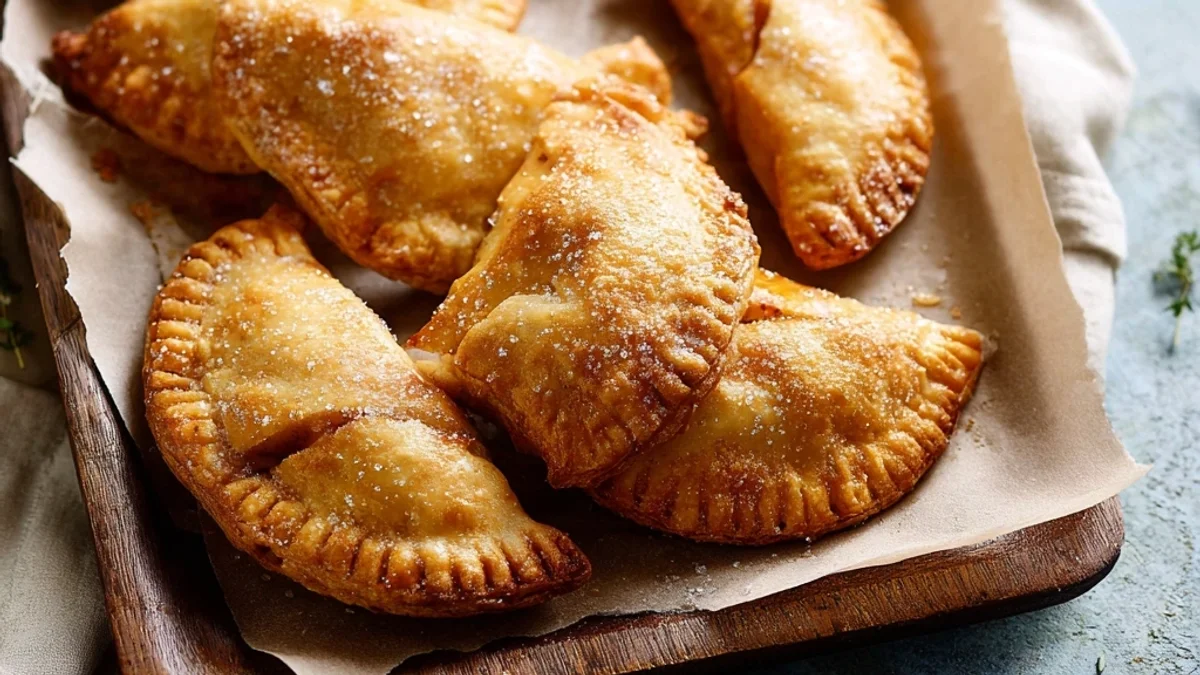
- Bake to Golden Perfection:
- Pop your baking sheet into a preheated oven at 375°F (190°C). Bake for about 20-25 minutes, or until your apple hand pies are beautifully golden brown and the filling is bubbly. You'll smell the glorious aroma of baked apples and cinnamon wafting through your kitchen, and honestly, it's one of the best parts of this recipe. Once they're done, let them cool on the baking sheet for a few minutes before transferring them to a wire rack. They'll be hot, so resist the urge to bite right in, even though it's so tempting!
Making these apple hand pies always brings a little joyful chaos to my kitchen. Flour dusts the counters, apple bits somehow end up on the floor, and there's always a moment of panic when I think the dough isn't going to cooperate. But then, as they bake, that incredible smell fills the house, and all the little imperfections just melt away. It's more than just baking, it's creating a memory, a little piece of comfort to share.
Storing Your Easy Apple Hand Pies
So, you've made a batch of these glorious apple hand pies, and now you're wondering how to keep them fresh. Honestly, they rarely last long in my house! But if you do have leftovers (lucky you!), let them cool completely on a wire rack first. Storing them warm will make them soggy, and nobody wants that. I've definitely made that mistake, wrapping them up too soon, only to find a sad, damp crust later. You can store them in an airtight container at room temperature for up to 2 days. If you want them to last longer, pop them in the fridge for up to 4-5 days. To reheat, a quick zap in the microwave is okay, but for that crisp crust, a few minutes in a toaster oven at 300°F (150°C) is the way to go. They’re pretty sturdy, which makes them great for packed lunches!

Ingredient Swaps for Your Apple Hand Pies
I'm all for experimenting in the kitchen, and these apple hand pies are pretty forgiving! For the apples, while Granny Smiths are my top pick for their tartness, you can totally try a mix of a tart apple with a sweeter one like Honeycrisp or Fuji. I once used only sweet apples, and it was a bit one-note, honestly. If you're out of brown sugar, granulated sugar works, but you'll miss that deeper caramel flavor. For the dough, if you're short on time, good quality store-bought pie crust is a lifesaver, just make sure it's an all-butter one if you can find it. I've even tried puff pastry in a pinch, and while it's a different vibe, it's still pretty delicious! You can play with the spices too a little ginger or allspice could be fun. Just try it and see what you like!
Serving Your Easy Apple Hand Pies
These apple hand pies are fantastic on their own, warm from the oven, maybe with a light dusting of powdered sugar. But let's be real, sometimes you want to make it an experience. My absolute favorite way to serve them is slightly warm with a scoop of really good vanilla bean ice cream. The contrast of warm pie and cold, melting ice cream is just... chefs kiss! A drizzle of homemade caramel sauce takes it up another notch. For a cozy afternoon treat, a mug of hot cider or a simple cup of black tea pairs wonderfully. And for a brunch gathering, they're delightful alongside some fresh fruit and a strong cup of coffee. They're versatile enough for almost any mood or occasion, honestly!
The Story Behind My Easy Apple Hand Pies
Hand pies, in various forms, have a rich history across many cultures from British pasties to Latin American empanadas, they’re essentially portable, delicious meals or desserts. My personal connection, as I mentioned, started with my grandma's gentle nudge and my own attempts at a full pie. But the idea of these individual, ready-to-grab treats always resonated with me. They speak to a simpler time, a kind of rustic ingenuity where you took what you had and made something comforting and satisfying. For me, creating these apple hand pies is a way to honor that tradition of home baking, making something with love that fits perfectly in your hand, a little piece of warmth you can carry with you. It feels like a small culinary hug.
And there you have it, my dear friends, a little piece of my kitchen, shared with you. These apple hand pies are more than just a recipe, they're a reminder of simple pleasures, of embracing imperfections, and of the pure joy of creating something delicious with your own hands. I hope they bring as much warmth and comfort to your home as they do to mine. Please, when you make them, tell me all about your kitchen adventures!

Frequently Asked Questions
- → Can I use other types of apples for these apple hand pies?
Yes, you definitely can! I prefer Granny Smiths for their tartness, but a mix of Granny Smith with a sweeter apple like Honeycrisp or Fuji works beautifully. I tried all sweet once, and it was a bit too sugary for me.
- → What if my dough is too sticky to work with?
Oh, I've been there! It usually means your butter got too warm. Pop the dough back into the fridge for 15-20 minutes to firm up. A little extra flour on your surface helps too, but don't overdo it!
- → How do I prevent the filling from leaking out?
The key is not to overfill, and to really press those edges down firmly before crimping with a fork. I often give them an extra pinch with my fingers before the fork. That one time I overstuffed, it looked like a volcanic eruption in my oven!
- → How long do these apple hand pies stay fresh?
They're best on day one, warm from the oven! But honestly, they'll stay good in an airtight container at room temperature for 2 days, or in the fridge for up to 5 days. Reheating in a toaster oven brings back some crispness.
- → Can I make these ahead of time and freeze them?
Absolutely! You can assemble the hand pies, then freeze them unbaked on a baking sheet until solid. Once frozen, transfer to a freezer bag. When ready to bake, pop them straight into the oven from frozen, adding about 5-10 minutes to the bake time. It's a lifesaver for last-minute cravings!