

I remember the first time I tried to make an apple pie from scratch. It was a disaster, honestly! The crust was soggy, the apples were either mushy or too hard, and the filling... well, it was just sad. My grandma, bless her heart, always made it look so effortless. She'd just toss things together, humming a tune, and out came the most incredible pie. I swore I'd never get there. But then, I broke it down, ingredient by ingredient, and discovered the secret to a really great pie isn't the crust (that's a battle for another day!), it's the filling. This Easy Homemade Apple Pie Filling recipe is my ode to her, and my confession that even I can make something delicious without too much fuss. It's warm, spiced, and just makes the whole house smell like a hug. Seriously, you'll feel like a kitchen wizard!
One time, I was so excited to make this Easy Homemade Apple Pie Filling for a potluck, I forgot to peel half the apples. I only realized it when I was stirring it on the stove and saw bright red apple skins floating around! I panicked for a second, then just shrugged. It added a rustic charm, I told myself. And honestly, no one even noticed. It still tasted divine. That's the beauty of cooking, isn't it? Sometimes the "mistakes" turn into happy accidents.
Ingredients
Sweet & Tangy Apples
- Apples (Granny Smith, Honeycrisp, Fuji blend): You need a good mix here, hon. Granny Smiths for that tart bite, Honeycrisp for sweetness and texture, and Fuji for a little extra crispness. Don't just use one kind unless you want a one-note filling. I tried all Granny Smith once, and it was too tart, even for me.
- Lemon Juice: This isn't just for flavor, it keeps your apples from browning and brightens everything up. Fresh squeezed is always, always better. I mean, come on, a little bottled stuff in a pinch is fine, but you'll taste the difference.
Flavor Foundation
- Granulated Sugar: The sweetness balance! Adjust this to your apples and your sweet tooth. Sometimes I add a little less if my apples are super sweet. Don't go crazy, though, you want the apple flavor to shine.
- Brown Sugar (light or dark): This is where the cozy, caramel-y notes come from. It adds depth that granulated sugar just can't. Dark brown sugar gives a richer flavor, which I adore, but light works just fine too.
- All-Purpose Flour or Cornstarch: This is your thickener. Flour gives a slightly opaque, traditional pie filling look, while cornstarch makes it crystal clear. I usually go for flour because it's what I always have, and it creates a lovely, rich sauce.
Spice Blend
- Ground Cinnamon: Essential! What's apple pie without cinnamon? I'm a bit heavy-handed with it, honestly. It just smells so good when it hits the warm apples.
- Ground Nutmeg: Just a pinch! It complements the cinnamon beautifully, adding that classic "pie spice" aroma. Freshly grated is next level, but pre-ground is totally okay.
- Pinch of Salt: Don't skip this! It enhances all the other flavors. Think of it as a secret weapon. I used to forget it all the time, and my fillings always felt like something was missing.
Instructions
- Prep Your Apples:
- First things first, get those apples ready. Peel 'em, core 'em, and slice 'em up into nice, even pieces. I usually go for about 1/4-inch thick slices. You want them to cook evenly, so try not to have super thick and super thin pieces in the same batch. This is where I usually get a little messy, apple peels everywhere! Once they're sliced, toss them immediately with the lemon juice in a big bowl. This prevents browning and gives a little zesty kick to your apple pie filling.
- Combine Dry Ingredients:
- In a separate, medium-sized bowl, whisk together your granulated sugar, brown sugar, flour (or cornstarch if you're using it), cinnamon, nutmeg, and that important pinch of salt. Make sure there are no lumps, especially with the flour. I once rushed this and ended up with little pockets of raw flour in my filling, which was not a good look or taste. Just a quick whisk will do the trick!
- Coat the Apples:
- Now, pour your dry sugar and spice mixture over the lemon-coated apples in the big bowl. Grab a spatula and gently toss everything together until all the apple slices are evenly coated. You'll see the sugar start to draw out some moisture from the apples. This step feels so good, the smell of apples and cinnamon already wafting up! It's the start of something delicious for your apple pie filling.
- Cook the Filling:
- Transfer the coated apples to a large pot or Dutch oven. Cook over medium heat, stirring occasionally, for about 8-10 minutes. You want the apples to start softening but still have a bit of a bite we're talking al dente here, not mush. The mixture will thicken as it cooks, becoming a beautiful, glossy sauce. Don't crank the heat too high, or you'll burn the sugars!
- Simmer to Perfection:
- Once the apples are slightly tender and the sauce has thickened to your liking, remove the pot from the heat. Give it one last good stir. The aroma filling your kitchen right now? That's pure magic, I tell ya! This is where your kitchen feels like a bakery. Taste a piece (carefully, it's hot!) to check for sweetness and spice. Adjust if you need to, but honestly, it's usually spot on.
- Cool & Use:
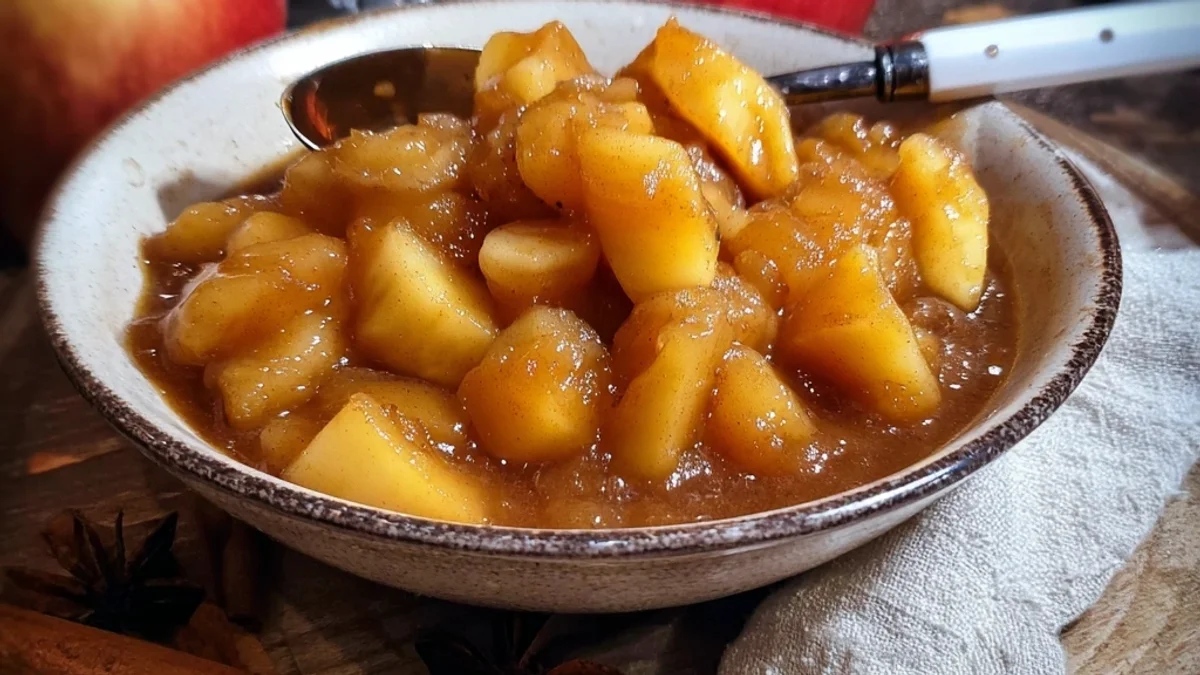
- Let the Easy Homemade Apple Pie Filling cool completely before using it in a pie, crumble, or even just spooning over ice cream. As it cools, it will thicken even more. You can transfer it to a heatproof container. The color will be a lovely golden-amber, and the apples will be perfectly tender. This filling holds up so well, you'll be glad you made it!
Making this filling always takes me back to chilly autumn afternoons, the kind where the air smells crisp and you just want to bake. I remember one time, my little niece was "helping" me, and she covered herself (and half the kitchen) in flour while trying to stir the apples. It was a mess, but her giggles were worth every speck of flour. This recipe, for me, isn't just about apples and spices, it's about those sweet, slightly chaotic kitchen memories.
Easy Homemade Apple Pie Filling Storage Tips
Okay, so you've got this glorious Easy Homemade Apple Pie Filling, and you're wondering how to keep it. Once it's completely cooled, transfer it to an airtight container. It'll last beautifully in the fridge for up to 5-7 days. I've definitely made a big batch on a Sunday and used it throughout the week for pies, oatmeal, or even just a spoonful straight from the container (don't judge!). You can also freeze it! Just pop it into a freezer-safe bag or container, leaving a little headspace. It'll stay good for up to 3 months. When you're ready to use it, thaw it in the fridge overnight. I microwaved it once when I was in a hurry, and the sauce got a little weird and separated so don't do that, lol. Slow and steady wins the race for thawing this deliciousness.

Easy Homemade Apple Pie Filling Ingredient Substitutions
Life happens, and sometimes you don't have exactly what the recipe calls for. For the apples, if you can't get a mix, just go with what you have. All Honeycrisp will be sweeter, all Granny Smith will be tarter. I once used only Gala apples, and it worked, but they got a bit soft. For the thickener, if you're out of flour, cornstarch works perfectly, just remember it makes a clearer sauce. You could even use arrowroot powder for a gluten-free option, though I haven't personally tried that one yet! If you're out of brown sugar, you can use all granulated sugar, but you'll miss that rich, molasses-y depth. You could also add a tiny splash of maple syrup to try and replicate it. As for spices, feel free to add a tiny bit of allspice or ginger if you like, I sometimes add a touch of cardamom for a different twist. Just don't go too wild, let the apples shine!
Serving Your Easy Homemade Apple Pie Filling
Oh, the possibilities! Obviously, this Easy Homemade Apple Pie Filling is destined for a pie, but let's get creative. Spoon it warm over vanilla ice cream for a simple, decadent dessert. It's fantastic stirred into oatmeal or yogurt for a breakfast upgrade that feels fancy but isn't. I've even used it as a topping for pancakes or waffles on a lazy Sunday morning. You could also layer it into a parfait with granola and whipped cream. And honestly, sometimes, a small bowl of it warmed up, maybe with a dollop of whipped cream, is just the perfect little treat for a movie night. It shines in any scenario where you want that warm, comforting apple flavor.
The Heart of Easy Homemade Apple Pie Filling: A Backstory
Apple pie, and by extension, this kind of filling, is so deeply rooted in American culture, isn't it? It evokes images of homesteads and grandmas in aprons. For me, it connects to my own family's history, not necessarily a specific "recipe" passed down, but the feeling of home baking. My earliest memories of my grandmother's kitchen always include the smell of apples and cinnamon. This Easy Homemade Apple Pie Filling isn't an ancient family secret, but it's my version, crafted from years of trying to recreate that feeling. It's a reminder that even simple ingredients can create something profoundly comforting and ties us to those cherished traditions of food and family. It’s about making new memories with old flavors.
So there you have it, my not-so-secret secret to a very wonderful Easy Homemade Apple Pie Filling. It’s warm, it’s comforting, and it makes your kitchen smell like pure joy. I honestly didn't expect to love making this so much, but it's become a ritual. I hope you give it a try and find your own sweet, slightly messy moments with it. Let me know what you think, or if you had any hilarious kitchen mishaps of your own!

Frequently Asked Questions
- → What are the best apples for apple pie filling?
Honestly, a mix is best! I always go for Granny Smith for tartness and Honeycrisp or Fuji for sweetness and texture. Using just one kind can make your filling a bit one-dimensional, which I learned after a few less-than-stellar pies.
- → Can I make this apple pie filling ahead of time?
Absolutely! That's one of my favorite things about it. You can whip up a batch, let it cool, and store it in an airtight container in the fridge for up to a week. It's a lifesaver for busy baking days, truly!
- → Why does my apple pie filling get watery?
Oh, I've been there! It usually means the apples released a lot of juice and didn't cook down enough, or perhaps not enough thickener was used. Make sure to cook it long enough for the sauce to visibly thicken on the stove, and don't skimp on the flour or cornstarch.
- → Can I freeze leftover apple pie filling?
Yes, you totally can! Just make sure it's completely cooled, then pop it into a freezer-safe bag or container. It'll keep for about 3 months. When you're ready to use it, thaw it slowly in the fridge to keep that lovely texture.
- → What if I don't have brown sugar for this apple pie filling?
You can use all granulated sugar, but your filling will miss that deep, caramel-y note. I've tried it, and while it's still good, it's not quite the same. You could add a tiny dash of molasses if you have it, or a bit of maple syrup for a similar richness.