

There are some recipes that just smell like home, you know? For me, that’s this Easy Classic Apple Crisp. I remember the first time I really nailed it I was probably 19, trying to impress someone (who ended up being my husband, haha!). The kitchen was a glorious disaster, flour everywhere, but the aroma of cinnamon and baking apples? Pure magic. It instantly transports me back to those simpler times, a bit messy but full of warmth. This dish isn't just dessert, it’s a hug in a bowl, a sweet reminder of family gatherings and quiet evenings.
I swear, one time I was so distracted by a podcast, I almost put salt instead of sugar in the topping. Can you imagine? A savory apple crisp! Luckily, I caught myself just in time. My husband still teases me about it, saying it would have been an "experimental" dish. Honestly, that's just part of the fun in my kitchen, a little oops here and there keeps things interesting, right?
Ingredients for This Easy Classic Apple Crisp
- Apples (Granny Smith, Honeycrisp, or a mix): You need a good, firm apple that holds its shape and offers a nice tartness to balance the sweet. I swear by Granny Smiths for that tangy kick, mixed with something sweeter like Honeycrisp. Don't use mushy apples, please, it’ll just be apple sauce, and that’s not what we’re going for.
- All-Purpose Flour: This is for both the filling (to thicken it up) and the crisp topping (for structure). I’ve tried gluten-free flour blends, and they work, kinda, but the texture is a bit different. Just a heads up if you're experimenting!
- Granulated Sugar & Brown Sugar: Granulated for the apple filling, brown sugar for that deep, molasses-y flavor in the crisp topping. Honestly, I sometimes add a little extra brown sugar to the topping because I like it extra rich and caramelized.
- Rolled Oats (Old-Fashioned): The star of the crisp topping! These give it that wonderful chew and texture. Quick oats can work in a pinch, but they disappear more into the butter, losing some of that rustic charm. Don't even think about steel-cut, that's a different adventure.
- Unsalted Butter (cold, cubed): This is crucial for a truly crumbly, tender crisp. Cold butter creates those pockets of steam that make it light and crunchy. I once used melted butter because I was in a rush, and it just became a dense, sad paste. Learn from my mistakes!
- Cinnamon & Nutmeg: These are your flavor boosters! They make the whole house smell incredible. Freshly grated nutmeg? Oh, that’s a game-changer, honestly. The aroma when you grate it is just divine, and it elevates the whole dish.
- Lemon Juice: A little splash in the apple filling. It brightens everything up and keeps the apples from browning too quickly. Don't skip it, it makes a difference, even if it's just a teaspoon!
- Vanilla Extract: Just a touch in the apple filling. It adds a subtle warmth and depth that you didn't even know you needed.
Instructions for Your Easy Classic Apple Crisp
- Prep the Apples:
- First things first, get those apples peeled, cored, and sliced. I usually go for about 1/4-inch thick slices, but honestly, sometimes they end up a bit chunkier if I'm chatting on the phone while doing it and that's okay! Toss them into a large bowl. You'll see them start to brown a little, but don't worry, the lemon juice comes next to save the day!
- Mix the Apple Filling:
- To those beautiful apple slices, add your granulated sugar, a tablespoon of flour, lemon juice, vanilla extract, and a good sprinkle of cinnamon and nutmeg. Give it a gentle stir until everything is coated. This is where the magic starts to happen, the apples begin to glisten, and the spices perfume the air. I always take a deep breath here, because that smell? It just screams "fall."
- Make the Crisp Topping:
- In a separate bowl, combine the rolled oats, the rest of the flour, brown sugar, a pinch of salt, and a little more cinnamon. Now, for the butter! Cut your cold butter into small cubes and use your fingertips or a pastry blender to work it into the dry ingredients. You want it to resemble coarse crumbs, with some pea-sized pieces of butter remaining. Don't overmix, or it'll get tough!
- Assemble Your Easy Classic Apple Crisp:
- Grab a 9x13 inch baking dish. Pour the apple mixture evenly into the bottom. It'll look like a lot of apples, but trust me, they cook down. Then, generously sprinkle that glorious crisp topping all over the apples. Make sure you get good coverage, every bite deserves some crunchy goodness! I sometimes add a little extra topping, oops, because why not?
- Bake to Golden Perfection:
- Pop that dish into a preheated oven at 375°F (190°C). Bake for about 40-50 minutes. You'll know it's ready when the topping is a beautiful golden brown and the apple filling is bubbling up around the edges. Honestly, the smell filling your kitchen at this point is just heavenly it’s almost impossible not to peek!
- Cool and Serve:
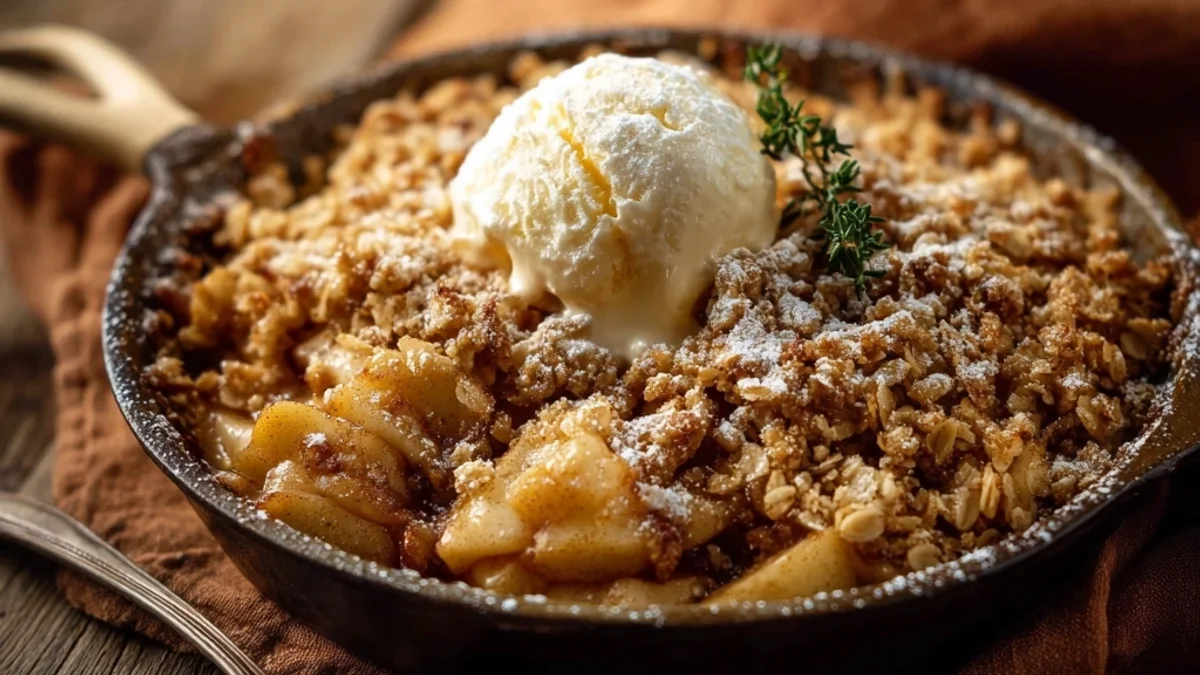
- Once it's out of the oven, resist the urge to dig in immediately (I know, it’s hard!). Let it cool for at least 15-20 minutes. This lets the filling set up a bit and prevents you from burning your tongue. Serve warm, maybe with a scoop of vanilla bean ice cream or a drizzle of caramel sauce. The contrast of warm, tender apples and that crunchy, sweet topping? Oh, it’s just divine!
One time, my kids decided to "help" and dumped a whole extra cup of oats into the topping. I didn't even notice until it was in the oven! It came out extra crunchy, almost like granola, but honestly, it was still pretty tasty. A happy accident, I guess! It just goes to show, even with a little kitchen chaos, this Easy Classic Apple Crisp always finds a way to be delicious.
Easy Classic Apple Crisp Storage Tips
So, you’ve got leftovers of this Easy Classic Apple Crisp? Lucky you! Once cooled, cover the dish tightly with plastic wrap or foil and pop it in the fridge. It’ll keep beautifully for about 3-4 days. Reheating? I like to warm individual servings in the microwave for a minute or so, but honestly, sometimes the crisp topping loses a little crunch. My favorite way to reheat is actually in a toaster oven or a regular oven at 300°F (150°C) for 10-15 minutes, until the topping crisps up again and the apples are warm and gooey. I once microwaved a whole dish, and the apples got a bit watery, so don't do that lol. It also freezes well for up to 3 months, just thaw overnight in the fridge and reheat in the oven.

Easy Classic Apple Crisp Ingredient Substitutions
Life happens, and sometimes you don't have exactly what the recipe calls for. For the apples, feel free to use whatever firm, tart-sweet apples you have on hand Braeburn, Gala, or Fuji work well too. I once tried it with pears, and it worked... kinda. It was delicious, but definitely a pear crisp, not apple! If you're out of brown sugar, you can use all granulated sugar in the topping, but you’ll miss that deep, caramel-y flavor. For the oats, if you only have quick oats, go for it, but expect a slightly less textured topping. If you're feeling adventurous, a pinch of cardamom with the cinnamon and nutmeg adds a lovely, warm note. I tried that once, and it was a revelation!
Serving Your Easy Classic Apple Crisp
This Easy Classic Apple Crisp is pretty fantastic on its own, but let’s be real, a warm apple crisp practically begs for a companion. My absolute favorite way to serve it is with a generous scoop of good quality vanilla bean ice cream. The cold, creamy ice cream melting into the warm, spiced apples and crunchy topping? Oh, it's pure bliss. A drizzle of homemade caramel sauce or even a dollop of freshly whipped cream also takes it to another level. For drinks, a hot cup of spiced chai tea or a robust coffee feels just right. Honestly, this dish and a good book on a rainy afternoon? Yes please. It’s perfect for a Sunday dinner dessert or even a special breakfast treat (don't judge!).
Cultural Backstory of Apple Crisp
The apple crisp, or apple crumble as it’s often called across the pond, is a dessert with humble beginnings, really. It gained popularity in the early 20th century, especially during wartime when ingredients for traditional pie crusts were scarce. A simple oat and butter topping was a clever, delicious alternative. For me, this dessert feels quintessentially American, tied to autumn harvests and cozy kitchens. My grandmother used to make a version with pecans in the topping, a little Southern twist she picked up. It wasn't fancy, but it was always made with so much love, and that’s the feeling I try to capture every time I bake this Easy Classic Apple Crisp. It's a reminder that simple ingredients, prepared with care, can create something truly special and comforting.
There you have it, my absolute favorite Easy Classic Apple Crisp recipe. It's more than just a dessert, it's a little slice of comfort, a memory in the making. Every time I pull it from the oven, the smell alone makes my heart happy. I hope you give it a try and maybe even make some of your own kitchen memories (and maybe a few "oops" moments too!). Don't forget to share how your crisp turned out in the comments below!

Easy Classic Apple Crisp Frequently Asked Questions
- → Can I make this Easy Classic Apple Crisp ahead of time?
Yes, you totally can! You can prep the apple filling and the crisp topping separately and store them in the fridge. Assemble and bake when you're ready. I’ve done it countless times for dinner parties!
- → What if I don't have unsalted butter for the crisp?
If you only have salted butter, just reduce the pinch of salt in the crisp topping by about half. I've tried it, and it works fine, just be mindful of the saltiness!
- → Why is my Easy Classic Apple Crisp topping not crispy?
Ah, a common kitchen dilemma! It's usually because the butter wasn't cold enough or you overmixed it. Remember, cold butter and a light touch are key for that beautiful crumbly texture!
- → How long does Easy Classic Apple Crisp last?
Covered tightly in the fridge, it's usually good for about 3-4 days. Honestly, I find it gets even better the next day, especially if you warm it up properly. My family usually finishes it before day 3 though!
- → Can I add other fruits to this Easy Classic Apple Crisp?
Absolutely! I've successfully added a cup of fresh cranberries for a tart kick, or even some sliced peaches when they're in season. Experimentation is encouraged, just be ready for a delightful surprise!