

I still remember that dreary November afternoon. The rain was drumming against the window, and I was feeling a bit… blah. My usual store-bought hot chocolate just wasn't cutting it. I rummaged through the pantry, honestly just looking for something, anything, to spark a little joy. That's when I stumbled upon a forgotten bag of good cocoa powder and an idea sparked. Could I make my own hot chocolate mix? I wasn’t sure, but I decided to give it a try. What started as a whim turned into this incredible Homemade Hot Chocolate Mix, a true winter treat that feels like a hug. It’s comforting, rich, and so much better than anything from a packet, I promise.
The first time I made a batch, I got a little overzealous with the salt. Oops! I thought a tiny pinch would enhance the chocolate, but I added a full teaspoon instead of a quarter. My first sip was... interesting, let's just say. It tasted like a chocolate ocean! I had to dump the whole mug. But, you know, live and learn, right? That's how I learned the importance of measuring carefully, especially with something so delicate. Now, I always double-check the salt amount for my Homemade Hot Chocolate Mix.
Ingredients for Homemade Hot Chocolate Mix
- Unsweetened Cocoa Powder: This is the star of our Homemade Hot Chocolate Mix, obviously! Don't skimp here, use a good quality unsweetened cocoa powder. I usually go for Dutch-processed because it gives a darker, smoother chocolate flavor. Honestly, it makes all the difference.
- Granulated Sugar: For sweetness, of course. You can adjust this to your liking, but this is the base. I once tried using brown sugar, and it was a bit too caramel-y for a classic hot chocolate mix, so I stick with white granulated.
- Powdered Sugar (Confectioners' Sugar): This is my secret weapon! It helps the mix dissolve super smoothly in hot milk, avoiding any gritty bits. I didn't expect it to make such a difference, but it truly does.
- Cornstarch: A tiny bit of cornstarch gives the hot chocolate a lovely, rich thickness. It's subtle, but it adds that luxurious mouthfeel you get from fancy cafes. I tried making it without once, and it felt a little thin, so I always add it now.
- Salt: Just a pinch, remember my earlier oops moment? It really enhances the chocolate flavor, bringing out its depth without making it taste salty. Trust me, it’s a game-changer when measured correctly.
- Vanilla Powder (Optional): If you can find it, vanilla powder adds an amazing warmth and depth that liquid vanilla extract just can't quite replicate in a dry mix. It’s a bit of an extra step, but I swear by it for my Homemade Hot Chocolate Mix.
- Cinnamon or Chili Powder (Optional): For a little kick! A tiny dash of cinnamon adds warmth, or a micro-pinch of chili powder for a Mexican hot chocolate vibe. I love playing around with these, sometimes I add more, sometimes less, depending on my mood.
Crafting Your Homemade Hot Chocolate Mix
- Gather Your Dry Ingredients:
- Alright, first things first, grab a large bowl. You want one big enough that you can really get in there and mix without everything flying out. Add your unsweetened cocoa powder, granulated sugar, powdered sugar, cornstarch, and that crucial pinch of salt. This is where the magic begins for our Homemade Hot Chocolate Mix, combining all those dry bits before they get to meet any liquid. I always make sure my bowl is completely dry, water and powdered ingredients can be a real mess, honestly.
- Whisk It Well:
- Now, grab a whisk and get to work! You want to thoroughly combine all those ingredients. Whisk for at least 2-3 minutes, making sure there are no lumps of cocoa or cornstarch. You know, sometimes I think I've mixed enough, but then I find a little pocket of unmixed powdered sugar later. So, really, give it a good, vigorous whisk until the color is uniform and everything looks perfectly blended. Don't rush this step, it's vital for a smooth drink later.
- Add Optional Flavor Boosters:
- If you're feeling adventurous, this is the moment to stir in your vanilla powder, cinnamon, or chili powder. Start with just a tiny amount, maybe 1/4 teaspoon of each, then taste a small amount mixed with hot milk later and adjust. I often add a bit more cinnamon than the recipe calls for because I just adore that warm spice. This is your chance to really personalize your Homemade Hot Chocolate Mix, make it sing!
- Sift for Smoothness (Optional, but I do it!):
- For an extra-smooth Homemade Hot Chocolate Mix, I honestly recommend sifting the entire mixture through a fine-mesh sieve into another clean bowl. This breaks up any remaining tiny clumps and ensures a super silky drink. It’s an extra step, yeah, but it makes such a difference in the final texture. I used to skip this, but after a few slightly lumpy mugs, I learned my lesson!
- Store Your Mix:
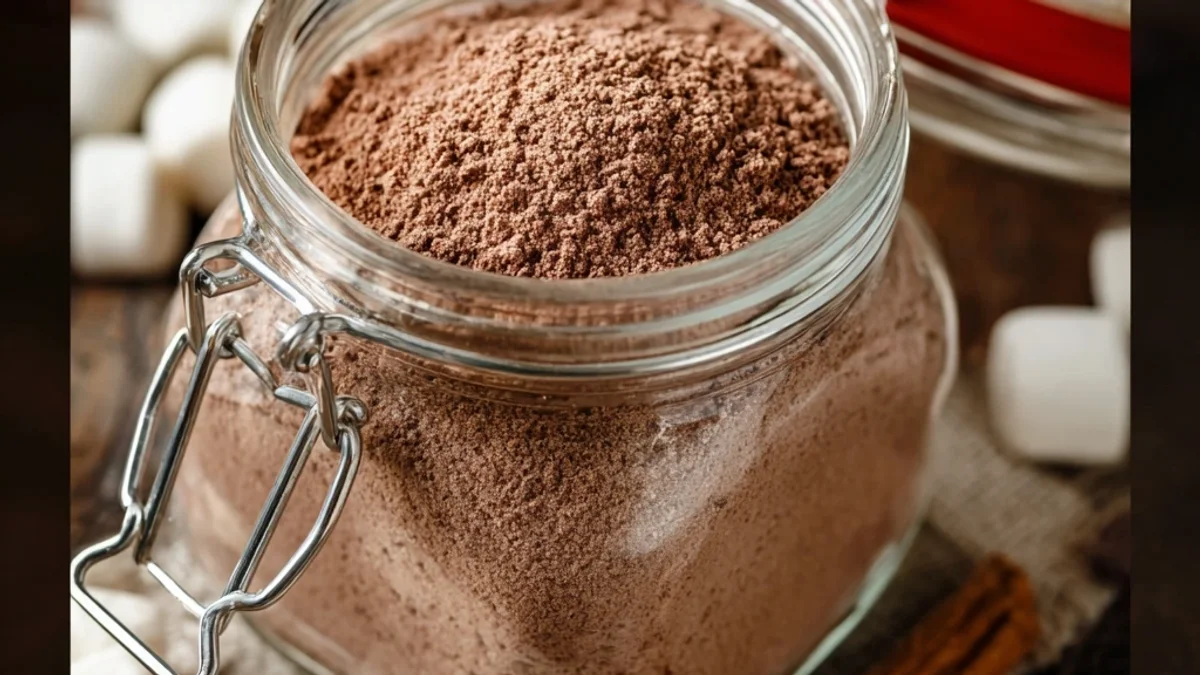
- Once your mix is perfectly blended and lump-free, transfer it to an airtight container. Glass jars with tight-fitting lids are my favorite, they look pretty and keep the mix fresh. Make sure it's completely sealed to keep out moisture, which can cause clumping. I usually label mine with the date and instructions, especially if I'm giving it as a gift. It just makes things easier, you know?
- Prepare a Mug of Bliss:
- To make a single serving, simply scoop 2-3 tablespoons of your Homemade Hot Chocolate Mix into a mug. Heat about 8 ounces of milk (any kind you like, whole milk is my preference for creaminess!) until hot but not boiling. Pour the hot milk over the mix, stirring constantly until it’s fully dissolved and smooth. Top with marshmallows, whipped cream, or a sprinkle of extra cocoa. It should look rich, smell wonderfully chocolatey, and taste like pure comfort. Enjoy!
There was one time I was making a big batch of this Homemade Hot Chocolate Mix for a holiday party, and my toddler decided to "help" by adding a handful of mini marshmallows to the dry mix. Honestly, it was chaos! I had to pick out every single sticky marshmallow. It was a mess, but we laughed about it later. That’s just real life in my kitchen, though. Despite the occasional mishaps, this mix always brings so much joy, and that's what matters.
Storing Your Homemade Hot Chocolate Mix
Keeping your Homemade Hot Chocolate Mix fresh is pretty straightforward, thankfully. I’ve found that an airtight container is truly your best friend here. I usually opt for glass jars, the kind with the rubber seals, because they just lock in the freshness so well. Plastic containers work too, but make sure the lid is really tight. Store it in a cool, dry place, like your pantry, away from any humidity. I once left a batch in a cupboard right above the stove, and with all the steam from cooking, it got clumpy and hard. Oops! Learn from my mistakes, haha. Properly stored, your mix should last a good 6-8 months, maybe even longer, though honestly, it never lasts that long in my house! Just give it a good shake or stir before each use if it's been sitting for a while.

Homemade Hot Chocolate Mix Variations
I’ve played around with so many different versions of this Homemade Hot Chocolate Mix, honestly! For a richer, darker chocolate, you can swap out half of the unsweetened cocoa powder for dark cocoa powder. I tried that once, and it was intensely chocolatey, almost like a dessert in a mug. If you’re not a fan of granulated sugar, you could try using coconut sugar, but be aware it will give it a slightly different, more caramel-like flavor I tried it, and it worked… kinda, but it wasn't my favorite for a classic taste. For a spiced version, try adding a pinch of ground cardamom or even a tiny bit of cayenne pepper for a subtle heat. I love adding a little espresso powder sometimes too, it really deepens the chocolate flavor without making it taste like coffee. Don't be afraid to experiment, that's half the fun!
Serving Suggestions
Oh, the serving possibilities for this Homemade Hot Chocolate Mix are endless! My absolute favorite way to enjoy it is with a generous dollop of freshly whipped cream, topped with a sprinkle of extra cocoa powder. But honestly, classic mini marshmallows are always a hit, especially for the kids (and, let’s be real, for me too!). For a grown-up treat, a splash of peppermint schnapps or a shot of espresso turns it into a decadent after-dinner drink. This mix pairs wonderfully with shortbread cookies or a slice of a simple pound cake. For a truly cozy night, a mug of this and a good book or a cheesy rom-com? Yes please, that’s my ideal evening. It just warms you right up, inside and out.
Cultural Backstory
Hot chocolate, or rather, its ancestors, have a pretty amazing history, stretching back thousands of years to ancient Mesoamerica! The Olmecs, Mayans, and Aztecs all consumed a bitter, spiced cocoa drink. It was a far cry from our sweet Homemade Hot Chocolate Mix today, they often mixed it with chili peppers, cornmeal, and other spices, and it was more of a ceremonial, invigorating beverage. When it arrived in Europe, particularly Spain, it slowly transformed, becoming sweetened and eventually a beloved drink across the continent. For me, discovering this history made my own mix feel even more special. It’s like carrying on a tradition, but with my own little kitchen twist. It connects me to something ancient and comforting, which is pretty cool, honestly.
So there you have it, my beloved Homemade Hot Chocolate Mix. It truly is more than just a recipe, it’s a little bit of warmth, a dash of comfort, and a whole lot of love in every single mug. Making it from scratch just feels so rewarding, and honestly, the taste is just incomparable. I hope you give it a whirl and find as much joy in it as I do. Don't forget to share your own variations or any funny kitchen stories you have, I’d love to hear them!

Frequently Asked Questions About Homemade Hot Chocolate Mix
- → Can I use a different type of sugar in this Homemade Hot Chocolate Mix?
You can, but I’d be cautious! I tried brown sugar once, and while it tasted okay, it changed the flavor profile quite a bit, making it less like a classic hot chocolate. Stick with granulated and powdered for the best results, honestly.
- → What if my Homemade Hot Chocolate Mix gets clumpy?
Oh, I’ve been there! Usually, it means moisture got in. Store it in a truly airtight container in a dry place. If it does clump, just give it a good stir with a spoon or even re-sift it before using. It'll still taste great!
- → How do I make a vegan Homemade Hot Chocolate Mix?
Super easy! The mix itself is already vegan. Just make sure to use your favorite plant-based milk when preparing your drink. Almond milk or oat milk work wonderfully for a creamy, dairy-free version. I've used both, and they're delicious.
- → Can I add mini chocolate chips to the dry mix?
You could, but I don't usually for the dry mix itself. They tend to settle at the bottom and don't dissolve as well as the powders. I prefer to add them directly to the hot milk when making a drink, that way they melt perfectly!
- → How long does Homemade Hot Chocolate Mix last?
If stored properly in an airtight container in a cool, dry place, your mix should easily last 6-8 months. I mean, mine never lasts that long, but theoretically! Just make sure that lid is super tight to keep it fresh.