

There are some smells that just pull you right back to a specific memory, aren't there? For me, the scent of baking apples and warm cinnamon takes me straight to my grandma’s kitchen on a crisp autumn afternoon. I remember trying to "help" her, mostly just making a glorious mess with flour and sneaking apple slices. This Classic Apple Crisp Recipe isn't just a dessert, it's a hug in a bowl, a reminder of simpler times and unconditional love. Honestly, it’s the dish I turn to when I need a little comfort, or when I just want my home to smell like pure happiness. It’s special because it’s so unfussy, yet delivers big on flavor, a truly heartwarming treat.
I remember one time, I was so excited to make this Classic Apple Crisp Recipe for a potluck, I completely forgot to add the flour to the apple filling. The result? Delicious, syrupy apples, but definitely more like a compote under a crisp topping, not quite the firm apple base I was aiming for! Everyone still loved it, thank goodness, but I learned my lesson about double-checking ingredients. Oops, kitchen chaos is real!
Ingredients for Classic Apple Crisp Recipe
- Granny Smith Apples: Honestly, these are my go-to for this Classic Apple Crisp Recipe. Their tartness holds up beautifully against the sweet topping and prevents the whole thing from being too cloying. I've tried softer apples and they just turn to mush, which isn't the texture we're going for, hon.
- Granulated Sugar: For that perfect touch of sweetness in the apple filling. Don't go crazy, the apples have their own natural sweetness, and the topping brings plenty too.
- All-Purpose Flour: This is a key player for both the apple filling (to thicken those juices, remember my compote disaster?) and the crisp topping. For a gluten-free version, I've had decent luck with a 1:1 GF baking flour, but the texture can be a little different, just a heads up.
- Fresh Lemon Juice: A little splash brightens everything up and keeps the apples from browning too quickly. It’s like a secret weapon, honestly.
- Ground Cinnamon: You can't have a Classic Apple Crisp Recipe without cinnamon! It just smells like home and warmth. Feel free to add a bit more if you're a cinnamon fiend like me.
- Rolled Oats: The heart of that crumbly, chewy topping. Don't use instant oats here, trust me, they just don't give you the right texture. I love how they get toasted and nutty.
- Light Brown Sugar: Brings that lovely molasses-y depth to the crisp topping. I've tried dark brown sugar once, and it was a bit too intense for my liking, but hey, you do you!
- Cold Unsalted Butter: The secret to a truly crumbly, tender crisp topping. It needs to be cold, cold, cold! I usually cube it and then pop it back in the freezer for 10 minutes before I start. This makes all the difference, honestly.
Making Your Classic Apple Crisp Recipe
- Prep the Apples:
- First things first, let's get those apples ready! Peel, core, and slice your Granny Smiths into about 1/4-inch thick pieces. I find this size cooks down nicely without turning into total mush. Toss them into a big bowl with the granulated sugar, flour, lemon juice, cinnamon, nutmeg, and a splash of vanilla extract. Give it a good stir until every apple slice is coated. This is where the kitchen starts to smell amazing, even before it hits the oven. Sometimes I add a tiny pinch of ginger here, just for a little extra warmth, if I'm feeling adventurous.
- Whip Up the Crumbly Topping:
- Now for the star of the show, that glorious crisp topping! In a separate medium bowl, combine the rolled oats, all-purpose flour, light brown sugar, granulated sugar, and a pinch of salt. Give it a quick whisk to mix everything evenly. Then, add your very cold, cubed unsalted butter. Use your fingertips, a pastry blender, or even a fork (though it takes longer!) to cut the butter into the dry ingredients until it resembles coarse crumbs, with some pea-sized pieces remaining. This is crucial for that signature crisp texture, don't overmix it, or you'll end up with a tough topping, I've been there!
- Assemble Your Crisp:
- Grab a 9x13 inch baking dish. Pour your perfectly seasoned apple mixture into the bottom, spreading it out evenly. Then, crumble that beautiful oat topping all over the apples. Don't press it down too much, we want those airy pockets for maximum crispiness! At this stage, it looks so promising, like a little mountain of future deliciousness. I always take a moment to admire my handiwork here, honestly, it's the little things.
- Bake to Golden Perfection:
- Pop your assembled Classic Apple Crisp Recipe into a preheated oven at 375°F (190°C) for about 40-50 minutes. You're looking for the topping to be golden brown and the apple filling to be bubbly and tender when you gently poke it with a knife. If the topping starts to get too dark too quickly, you can loosely tent it with foil. Your kitchen will smell absolutely divine, like pure autumn magic. This is the hardest part, waiting for it to be ready!
- The Waiting Game (It's worth it!):
- Once it's out of the oven, I know it's tempting to dig in right away, but trust me, let your Classic Apple Crisp Recipe cool on a wire rack for at least 15-20 minutes. This gives the apple filling a chance to set up a bit and prevents it from being a runny mess. Plus, it's still plenty warm to enjoy that comforting feeling. I've burned my tongue many a time trying to rush this step, so learn from my mistakes, friend!
- Serve with Love:
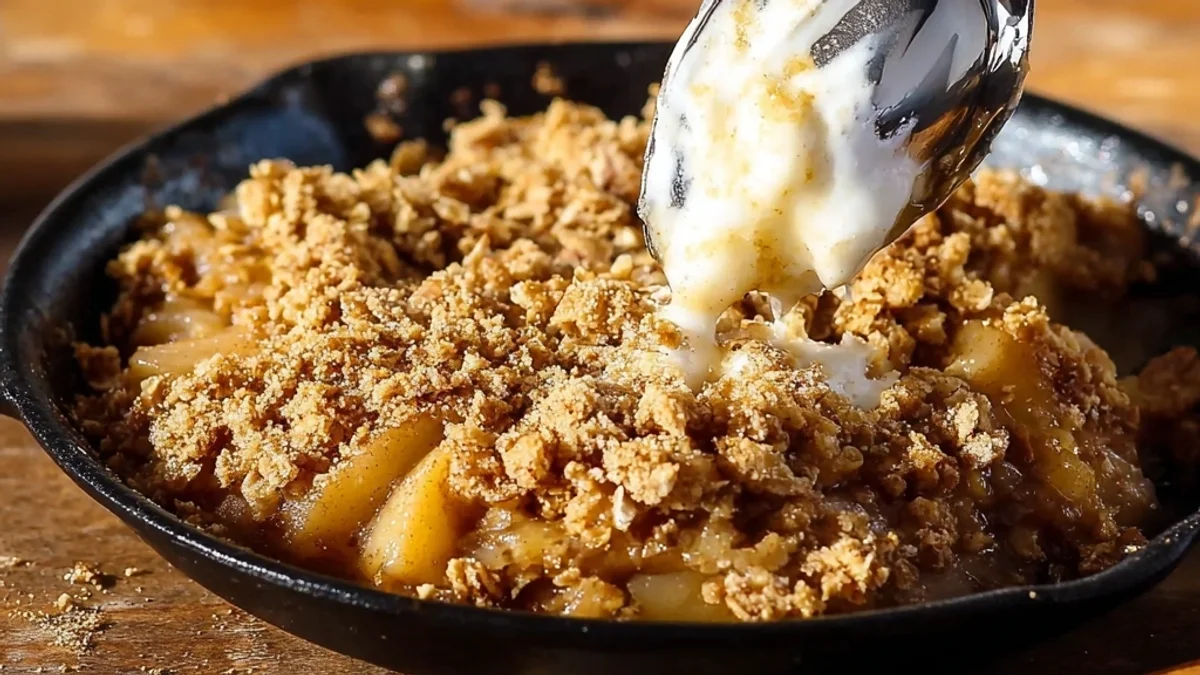
- Now for the best part! Scoop generous portions of your warm Classic Apple Crisp Recipe into bowls. It’s absolutely fantastic on its own, but if you want to elevate it, a dollop of vanilla ice cream or a cloud of freshly whipped cream is non-negotiable in my book. The contrast of warm crisp and cold cream? Oh, it's just dreamy! This is where all that effort pays off, big time. Enjoy every single bite!
I remember one blustery evening, the power went out right as I was pulling this Classic Apple Crisp Recipe from the oven. We ended up eating it by candlelight, with flashlights strategically placed. It wasn't the fancy dinner I'd planned, but honestly, that warm, spiced apple crisp tasted even better, a little beacon of comfort in the dark. It just goes to show, sometimes the imperfections make the memory.
Classic Apple Crisp Recipe Storage Tips
If you happen to have any leftovers of this Classic Apple Crisp Recipe (a rare occurrence in my house, honestly!), you can store it right in the baking dish, covered tightly with plastic wrap or foil, in the refrigerator for up to 3-4 days. When reheating, I usually pop individual servings into the microwave for a minute or so, but be warned, the topping loses a bit of its crispness that way. For a truly revived crisp, reheat it in a preheated oven at 350°F (175°C) for about 15-20 minutes until warmed through and the topping gets a little crunchy again. I microwaved it once and the sauce separated a bit so don't do that if you want it looking pristine, lol. It still tasted good, just not as pretty.

Classic Apple Crisp Recipe Ingredient Substitutions
Okay, let's talk swaps! For the apples, while Granny Smiths are my absolute favorite for this Classic Apple Crisp Recipe, you can mix it up. I've tried Honeycrisp or Braeburn for a sweeter crisp, and it worked, kinda. They get a bit softer, faster, so adjust baking time. If you're gluten-free, a 1:1 gluten-free all-purpose flour blend works well for both the filling and topping, I’ve used Bob’s Red Mill with decent results. For a dairy-free version, use a good quality plant-based butter alternative in the topping. Just make sure it's cold! I once used coconut oil, and it gave a slightly different flavor profile, not bad, just different. Experimenting is part of the fun, right?
Classic Apple Crisp Recipe Serving Suggestions
Honestly, a warm bowl of this Classic Apple Crisp Recipe is a complete experience on its own. But if you're like me and love to go all out, here are my favorite pairings. A big scoop of good quality vanilla bean ice cream is a non-negotiable for me the cold cream melting into the warm apples? Divine! Freshly whipped cream is another fantastic option, especially if you add a tiny hint of vanilla or a dash of cinnamon to it. And for a truly comforting evening, I love serving it with a hot cup of black tea or a creamy latte. This dish and a good book on a rainy afternoon? Yes please! It just hits different.
Cultural Backstory of Classic Apple Crisp Recipe
Apple crisp, or apple crumble as it's often called across the pond, is a quintessential American comfort food, though its roots are a bit tangled. It really gained popularity during world War II, when ingredients for pies were rationed, making a crisp a more economical and accessible dessert. It's a testament to ingenuity and making do with what you have. For me, it's always felt like a true American classic, passed down through generations. My grandma always said it was her mom's recipe, and I've kept that tradition alive, adding my own little twists along the way. It’s a dish that tells a story of home, resilience, and simple, wholesome goodness.
Final thoughts on this Classic Apple Crisp Recipe. It's more than just apples and oats, it’s a little piece of comfort, a memory, and a promise of warmth on a chilly day. Every time I make it, I’m transported back to those happy kitchen moments. I hope it brings as much joy to your table as it does to mine. Don't be shy, give it a whirl, and maybe even share your own kitchen adventures with this humble, yet glorious, dessert!

Frequently Asked Questions
- → What kind of apples are best for Classic Apple Crisp Recipe?
Honestly, Granny Smith apples are my top pick for this Classic Apple Crisp Recipe. Their tartness balances the sweetness, and they hold their shape beautifully during baking. I’ve tried sweeter apples, but they can get a bit too mushy for my taste, creating a less satisfying texture.
- → Can I make this Classic Apple Crisp Recipe gluten-free?
Absolutely! I've had success swapping the all-purpose flour for a 1:1 gluten-free baking flour blend in both the filling and the topping. Just make sure your rolled oats are certified gluten-free, as some can have cross-contamination. The texture might be a tiny bit different, but it still tastes amazing!
- → How do I prevent a soggy bottom in my Classic Apple Crisp Recipe?
Ah, the dreaded soggy bottom! My personal trick is two-fold: first, make sure your apple slices aren't too thin, so they don't release all their juice too fast. Second, ensure your oven is hot enough, and don't pull it out too early. Letting it rest after baking also helps the juices thicken up. I’ve definitely learned this the hard way!
- → How long does Classic Apple Crisp Recipe last?
This Classic Apple Crisp Recipe is best enjoyed warm on the day it's made, but leftovers are still delicious! Covered tightly, it'll keep in the refrigerator for 3-4 days. The topping might soften a bit, but a quick reheat in the oven brings back some of that crispness. I wouldn't push it past 4 days, honestly.
- → Can I add nuts to the crisp topping?
Oh, you absolutely can, and I often do! Chopped pecans or walnuts add a fantastic extra crunch and a lovely nutty flavor to the crisp topping. I just stir about half a cup into the dry ingredients before adding the butter. It’s a simple tweak that makes this Classic Apple Crisp Recipe even more special, I think!