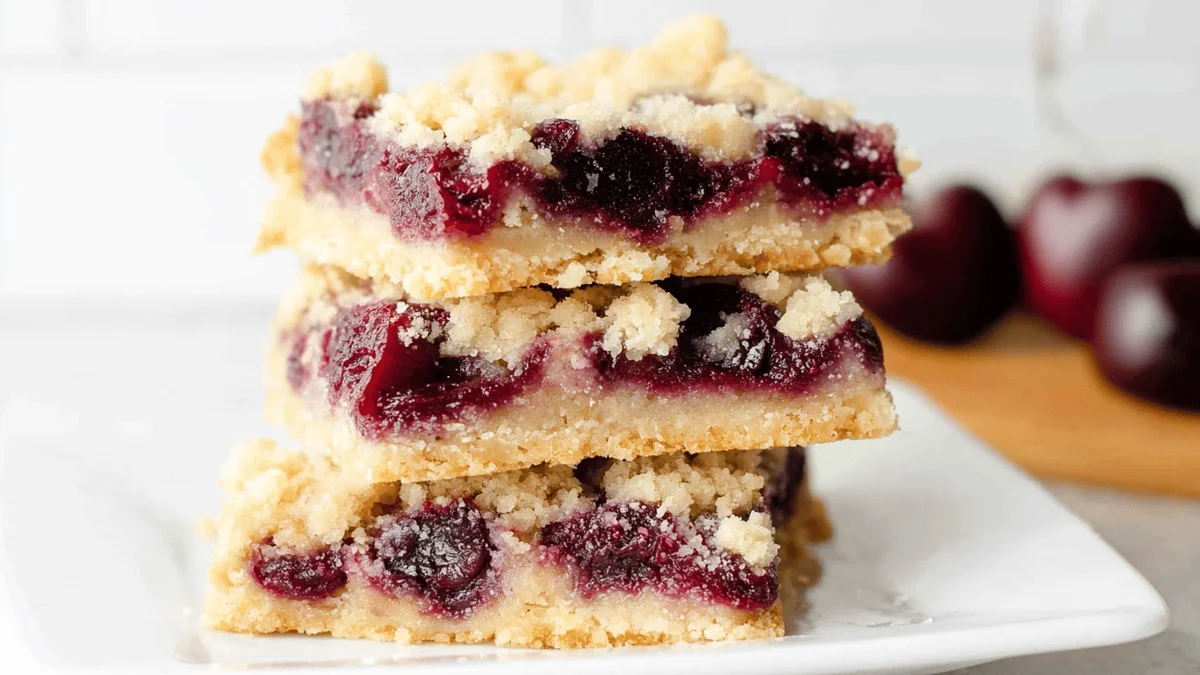


Introduction to Cherry Crumb bars
There’s something magical about biting into a sweet, buttery treat that’s bursting with fruity flavors. Enter: Cherry Crumb bars! Whether you're baking for a family gathering, a picnic, or simply treating yourself after a tough Thursday, this recipe is as comforting as it is indulgent. With their crumbly crust, juicy cherry filling, and golden-brown topping, these bars are bound to win over hearts and taste buds!
Why You’ll Love This Cherry Crumb Bars Recipe
These bars are a delightful fusion of textures and flavors crunchy meets buttery meets fruity goodness. They’re ridiculously easy to make, yet look bakery-worthy. Bonus: the recipe is versatile, so you can tweak it to match your cravings or seasonal fruit availability!
Ingredients for Cherry Crumb Bars
The charm of Cherry Crumb Bars lies in their simplicity. With just a handful of pantry staples and some fresh or frozen cherries, you’ll have a dessert that looks like you spent hours in the kitchen.
Essential Ingredients
- All-Purpose Flour:
- The foundation of the buttery crust and crumbly topping.
- Unsalted Butter:
- Ensures the bars are rich and melt-in-your-mouth delicious.
- Sugar:
- Balances the tartness of cherries and sweetens up the crust.
- Fresh or Frozen Cherries:
- Star of the show choose sweet cherries for a balanced flavor or tart cherries for a zingy kick.
Optional Additions or Swaps
Add a splash of vanilla extract for extra warmth or swap some cherries for blueberries for a mixed-berry surprise. Crushed almonds on top? Instant elegance!
How to Make Cherry Crumb Bars
Step 1: Prep Work Made Easy
Washing and Chopping
If using fresh cherries, give them a thorough rinse, pit them (pro tip: use a straw for quick pitting!), and chop them as needed. Frozen cherries? Thaw and drain excess liquid.
Measuring Ingredients
Precision is key! Use proper measuring cups for dry and liquid ingredients, and cut your butter into small pieces for even distribution in the crust and topping.
Step 2: Cooking the Base
Sautéing for Flavor
Preheat your oven and start building the base by mixing flour, sugar, and butter. Spread evenly in a prepared pan and bake until golden trust us, your kitchen will smell divine!
Simmering to Perfection
While the base bakes, cook your cherry filling until it thickens slightly and bubbles gently. Patience pays off here!
Step 3: Finishing Touches
Taste Testing and Adjustments
Sample that filling you deserve it! If it’s too tart, adjust with a touch of sugar.
Plating Like a Pro
Once the bars cool, use a sharp knife to achieve clean edges. Dust the top with powdered sugar for an elegant finish.
Tips for perfect Cherry Crumb Bars
Essential Tools for Cherry Crumb Bars
A mixing bowl, a good-quality baking pan, a whisk, and a cherry pitter (if using fresh cherries) are all you need for success!
Creative Variations of Cherry Crumb Bars
Dietary-Friendly Tweaks
Make these gluten-free by swapping in almond flour and oat flour. Going vegan? Use a plant-based butter substitute.
Seasonal Twists
Feel festive? Add a cinnamon and nutmeg sprinkle during autumn or a lemon zest kick for a spring vibe.
Serving and Pairing Ideas
Pair these bars with a scoop of vanilla ice cream for ultimate indulgence. For a cozy winter dessert, serve warm with a drizzle of caramel sauce cue the oohs and ahhs!
Frequently Asked Questions
Can I Freeze This Dish?
Absolutely! Wrap the bars in parchment paper, store in an airtight container, and freeze for up to 3 months.
How Do I Adjust for Dietary Restrictions?
Check the optional swaps section above for gluten-free and vegan alterations that retain the magic.
What If I Don’t Have [Tool]?
No cherry pitter? A sturdy straw or chopstick will do the trick!
Final Thoughts on Cherry Crumb Bars
Cherry Crumb Bars are the dessert equivalent of a warm hug wholesome, sweet, and endlessly satisfying. Make them once, and they’ll quickly turn into a family favorite. What are you waiting for? Get baking and savor every bite!