

Honestly, some smells just instantly transport you, right? For me, it's the warm, cinnamon-spiced aroma of a Classic Homemade Apple Pie Recipe baking in the oven. It takes me straight back to my grandmother’s kitchen, a place of comforting chaos and endless deliciousness. I remember watching her, flour dusting her apron, rolling out dough with a practiced ease I could only dream of. My first attempts? Oh, they were... rustic. More like apple crumble in a sad, collapsed crust. But every single "oops" moment taught me something, and slowly, painstakingly, I started to get it. This Classic Homemade Apple Pie Recipe isn't just dessert, it's a hug, a memory, and a reminder that some things are worth the effort.
I still laugh thinking about the time I tried to make this Classic Homemade Apple Pie Recipe for a potluck and forgot to add sugar to the filling. My friend took a bite, paused, and just said, "Well, it's... very tart!" We still joke about it. I mean, who forgets sugar in an apple pie? Me, apparently! That's why I always double-check my ingredients now, especially the sweet stuff. It's all part of the baking adventure, right?
Ingredients for Classic Homemade Apple Pie Recipe
- All-purpose flour: This is the foundation of your flaky crust, hon. Don't skimp on measuring, or you'll end up with a sticky mess or a rock-hard disaster. I've been there!
- Unsalted butter: You want it super cold, cut into cubes. Seriously, cold butter is the secret to a tender, flaky crust. I once used slightly soft butter, and my crust was more like a cookie delicious, but not pie-like.
- Granny Smith apples: My absolute go-to for apple pie. Their tartness holds up beautifully against the sugar and spices, giving that classic apple pie tang. I've tried other apples, and while some are okay, Granny Smiths just hit different.
- Granulated sugar: Balances the tart apples. You can adjust it slightly, but don't go too wild. I like to smell the sweetness before I add it, a little habit I picked up.
- Ground cinnamon & nutmeg: The dynamic duo! These spices are what give Classic Homemade Apple Pie Recipe its soul. Honestly, fresh nutmeg grated makes a world of difference.
- Lemon juice: A splash prevents the apples from browning and brightens the flavors. It’s a little secret weapon, a subtle lift that makes the filling sing.
- Egg wash (egg + water): For that gorgeous, golden-brown crust. It makes your pie look like it stepped out of a magazine, even if your kitchen looks like a flour bomb went off.
- Cornstarch: My trick for a perfectly thick, never watery, apple filling. I once skipped it, and let's just say my pie was swimming. Never again!
Instructions for Your Classic Homemade Apple Pie Recipe
- Step 1: Prep the Pie Crust Dough
- Alright, first things first for this Classic Homemade Apple Pie Recipe: we're making that glorious crust. In a large bowl, whisk together your flour and a pinch of salt. Now, add your super cold, cubed butter. Use a pastry blender or your fingertips to cut the butter into the flour until it resembles coarse crumbs with some pea-sized butter pieces. This is where the magic starts! Slowly add ice water, a tablespoon at a time, mixing just until the dough comes together. Don't overmix, or your crust will be tough. I always seem to add just one too many tablespoons of water, so go easy!
- Step 2: Chill the Dough
- Divide the dough in half, flatten each into a disk, and wrap them tightly in plastic. Pop them in the fridge for at least 30 minutes, or even better, an hour. This chilling time is non-negotiable, trust me! It lets the gluten relax, making the dough easier to roll out, and keeps that butter nice and cold for flakiness. I once tried to rush this step, and the dough was a sticky, tearing nightmare. Learn from my mistakes, friend!
- Step 3: Prepare the Apple Filling
- While your dough chills, let's get those apples ready for your Classic Homemade Apple Pie Recipe. Peel, core, and slice your Granny Smith apples about 1/4-inch thick. In a big bowl, toss them with granulated sugar, cornstarch, cinnamon, nutmeg, and that little splash of lemon juice. Mix it all up until every apple slice is coated. The smell of this mixture is just divine it's when you really start to feel that apple pie vibe coming alive in your kitchen!
- Step 4: Roll Out the Crust
- Once the dough is chilled, take one disk out and flour your work surface and rolling pin. Roll out the dough into a 12-inch circle. Carefully transfer it to your 9-inch pie plate. Trim the edges, leaving about a 1-inch overhang. I always seem to roll it out a bit lopsided, but that's okay! Just gently nudge it into place. Don't worry about perfection, homemade is charmingly imperfect.
- Step 5: Assemble the Pie
- Pour your apple filling into the pie crust, mounding it slightly in the center. Then, roll out the second disk of dough for the top crust. You can lay it over the apples, or if you're feeling fancy, cut it into strips for a lattice top. My lattice often looks a bit wonky, but it still tastes amazing! Trim the top crust, leaving an overhang, then crimp the edges of both crusts together. This seals in all that deliciousness. I sometimes forget to crimp properly, and then the juices bubble out, causing a messy but tasty situation!
- Step 6: Bake Your Classic Homemade Apple Pie Recipe
- Brush the top crust with your egg wash and cut a few slits in the top (if not doing lattice) to vent steam. This is crucial! Pop your pie into a preheated 400°F (200°C) oven for 15 minutes, then reduce the temperature to 375°F (190°C) and bake for another 45-50 minutes, or until the crust is golden brown and the filling is bubbly. If the crust starts browning too quickly, loosely tent it with foil. The aroma filling your kitchen right now? That’s pure bliss, friend. Let it cool before slicing, if you can resist!
There’s this moment when the Classic Homemade Apple Pie Recipe comes out of the oven, golden and fragrant, and you just know you did something wonderful. Even with the flour on my nose and a few apple juice drips on the counter, it feels like a victory. It’s messy, it’s real, and it’s always worth it for that first warm slice. The house smells incredible, and everyone just gravitates to the kitchen. That’s the magic, isn't it?
Storage Tips for Your Classic Homemade Apple Pie Recipe
Okay, so you've made this beautiful Classic Homemade Apple Pie Recipe, and hopefully, you have some leftovers! If you do, store it loosely covered with foil or plastic wrap at room temperature for up to 2 days. Honestly, I find it tastes even better the next day as the flavors meld. For longer storage, pop it in the fridge for up to 4-5 days. Just a heads-up: I microwaved a slice once, and the crust got a bit soggy so don't do that lol. A quick warm-up in a low oven (around 300°F/150°C) for 10-15 minutes is the trick to reviving that flaky crust. You can also freeze whole baked pies, wrapped tightly, for up to 3 months. Thaw overnight in the fridge and reheat in the oven.

Classic Homemade Apple Pie Recipe Ingredient Substitutions
Life happens, and sometimes you don't have exactly what the Classic Homemade Apple Pie Recipe calls for. I get it! For apples, while Granny Smiths are my favorite, a mix of Honeycrisp and Braeburn can work too, though the pie might be a little sweeter. I tried using all Red Delicious once, and it turned into mush so avoid those! If you don't have cornstarch, a tablespoon or two of all-purpose flour can work as a thickener, but cornstarch gives a clearer, less cloudy filling. For spices, feel free to play around, a pinch of allspice or ginger can add a lovely twist. I've even swapped some of the granulated sugar for brown sugar for a deeper, molasses-y flavor, and it worked beautifully, adding a lovely warmth.
Serving Your Classic Homemade Apple Pie Recipe
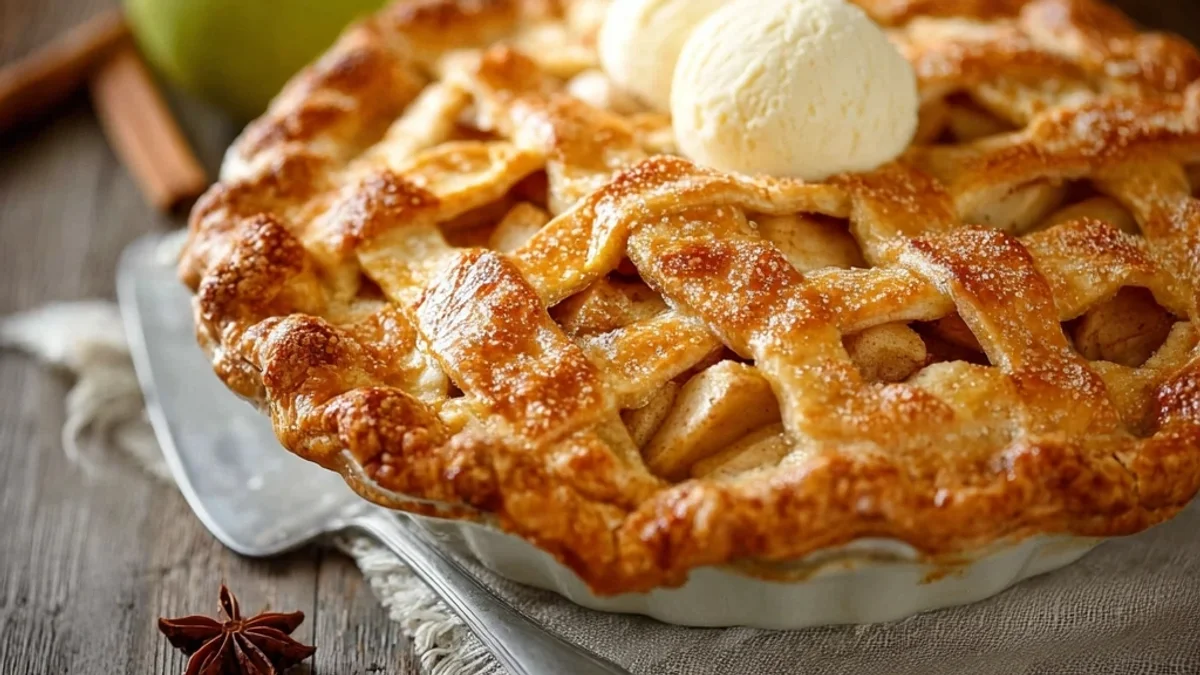
This Classic Homemade Apple Pie Recipe is a star all on its own, but oh, the possibilities! For me, a warm slice with a scoop of vanilla bean ice cream is pure bliss the cold cream melting into the warm, spiced apples? Yes please! A dollop of freshly whipped cream is also a fantastic choice, adding a lightness that balances the richness of the pie. It's also surprisingly good with a sharp cheddar cheese slice, if you're into that sweet and savory combo, my grandpa swore by it! And honestly, a simple cup of hot coffee or a steaming mug of spiced cider on a chilly evening? That's my perfect pairing for this comforting pie. It just feels right.
The Sweet Story of Apple Pie
Apple pie, especially a Classic Homemade Apple Pie Recipe, feels so American, right? But apples and pies actually have a much older history, originating in Europe! Early recipes were more about preserving fruit and often had savory fillings. It wasn't until much later that sugar became more accessible and the sweet apple pie we know and love evolved. For me, this pie is deeply rooted in memories of family gatherings, of harvest seasons, and the simple joy of sharing something homemade. It’s a dish that transcends generations, bringing people together around the table. It’s a testament to simple ingredients creating something truly extraordinary, and that's why it holds such a special place in my heart.
And there you have it, my take on a Classic Homemade Apple Pie Recipe. It's more than just flour and fruit, it's tradition, it's comfort, it's a little bit of kitchen chaos, and a whole lot of love. Every time I bake it, I'm reminded of all the sweet moments and even the funny mishaps along the way. I really hope you give it a try and make some delicious memories of your own. Let me know how your pie turns out!

Frequently Asked Questions About Classic Homemade Apple Pie Recipe
- → What's the best type of apple for this Classic Homemade Apple Pie Recipe?
Honestly, Granny Smith apples are my absolute favorite for pie! Their tartness balances the sweetness beautifully and they hold their shape well during baking. I once used softer apples, and they just turned to mush, so stick with firm, tart varieties.
- → Can I make the pie crust ahead of time?
Absolutely! I always recommend making the crust dough a day or two in advance. Just wrap the disks tightly in plastic wrap and store them in the fridge. It actually helps the gluten relax, making it easier to roll and ensuring a flakier crust. It's a lifesaver for busy days!
- → My pie crust always shrinks! Any tips?
Oh, I totally get that! The biggest culprit is usually not chilling the dough enough, or overworking it. Make sure your butter is super cold and you don't knead the dough too much. Also, let the rolled-out crust rest in the pie plate in the fridge for 15 minutes before adding the filling. It really helps!
- → How do I prevent a soggy bottom crust?
A soggy bottom is the worst, right? My trick for this Classic Homemade Apple Pie Recipe is to pre-bake the bottom crust (blind bake) for about 10-15 minutes before adding the filling. Also, make sure your filling isn't too watery, cornstarch helps a lot here. And a hot oven start helps too!
- → Can I use frozen apples for this Classic Homemade Apple Pie Recipe?
You can, but I usually don't recommend it for a truly "classic" pie because they can release a lot of water and make the filling soupy. If you must, thaw them completely, drain all the liquid, and perhaps add a bit more cornstarch to your filling. It's an "emergency only" swap for me!