

I remember the first time I tried to make hibachi fried rice at home. It was after a particularly chaotic week, and I was craving that restaurant magic without the price tag. I thought, "How hard can it be?" Well, let's just say my first attempt was... soggy. Like, really soggy. My kitchen smelled amazing, but the texture? A disaster! Still, that savory aroma of garlic and soy sauce lingering in the air? That's what kept me coming back. This dish, once I finally got it right, became my little triumph, a comforting hug after a long day.
One time, I was so excited to get dinner on the table, I forgot to let the rice cool completely. Rookie mistake, I know! It turned into this clumpy, sticky mess that tasted good but looked... well, let's just say it wasn't Instagram-ready. My husband, bless his heart, said it was "rustic." We still laugh about "rustic rice night." But hey, you learn, right? That's part of the journey with any fried rice recipe.
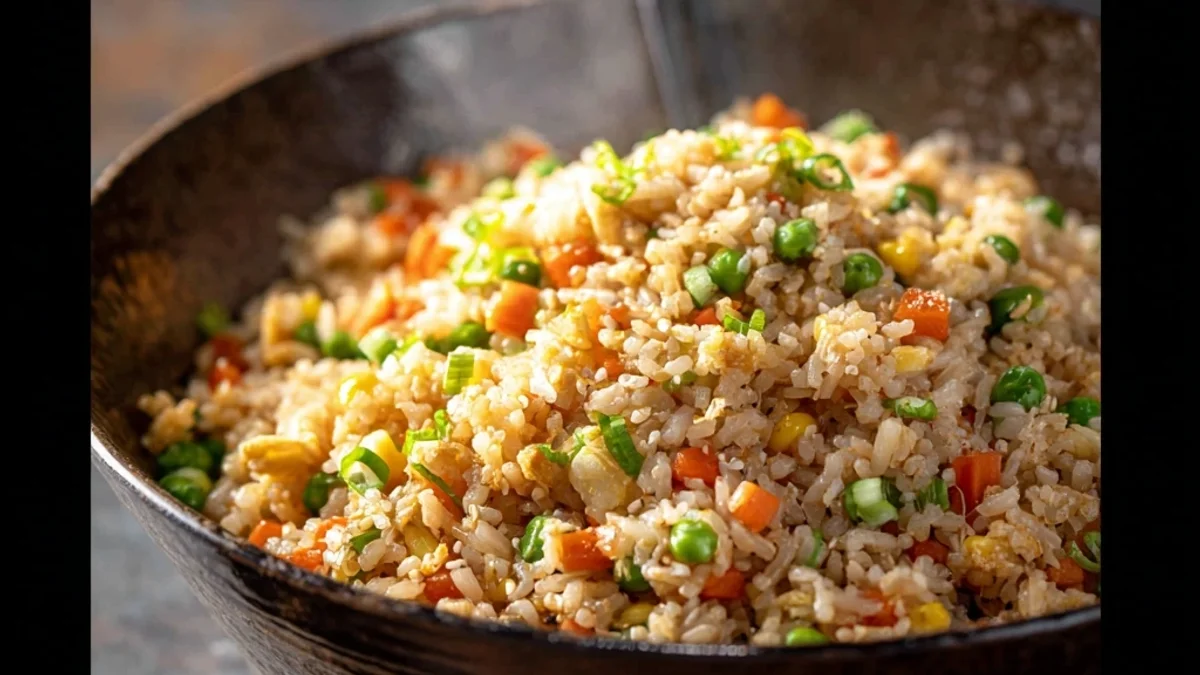
Ingredients for Homestyle Hibachi Fried Rice
- Day-old cold rice: This is non-negotiable, honestly. Freshly cooked rice will turn your Hibachi Style Fried Rice Recipe into a gummy mess. I learned that the hard way, many times!
- Sesame oil: It's the secret sauce for that authentic, nutty aroma. I always keep a good quality one on hand, it makes all the difference, trust me.
- Soy sauce: Don't skimp here! A good quality soy sauce brings depth. I've tried low-sodium, and it works, kinda, but the full-flavor just hits better.
- Butter: A generous knob of butter gives it that rich, restaurant-style sheen and flavor. Don't use margarine, it just doesn't melt the same or taste as good.
- Garlic &, Ginger: Fresh is best here, a total flavor bomb! I tried dried once when I was in a rush, and it just wasn't the same. My kitchen smelled... okay, but not amazing.
- Eggs: Scrambled in, they add protein and a lovely texture. My kiddo loves helping crack them, even if a shell or two sometimes makes it in, oops!
- Frozen mixed vegetables: Peas, carrots, corn super convenient. I've also thrown in fresh chopped bell peppers when I had them, and they were lovely, too.
- Onion &, Green onions: Onion for a foundational savory flavor, and green onions for that fresh, sharp finish. I always add extra green onions, just because!
Crafting Your Hibachi Style Fried Rice Recipe
- Prep Your Mise en Place:
- Before you even think about firing up that wok, get everything ready. Chop your veggies, mince your garlic and ginger, whisk your eggs. Honestly, this is where I always go wrong if I don't prep. I once tried to chop an onion mid-fry, and let's just say there was a lot of smoke and a few tears! It makes the whole fried rice process so much smoother and less chaotic.
- Scrambling the Eggs:
- Heat a little oil in your wok or large skillet over medium-high heat. Pour in your whisked eggs and scramble them quickly until just set but still soft. Break them into small pieces and then scoop them out onto a plate. This step is quick, but crucial for that fluffy egg texture we want in this Hibachi Style Fried Rice. Don't overcook them, or they'll be rubbery, an "oops" I've made too many times!
- Sautéing the Aromatics:
- Add a bit more oil and a generous pat of butter to the hot wok. Toss in your chopped onion, garlic, and ginger. Sauté for about a minute until fragrant. Oh, the smell here! This is where your kitchen starts to smell like a proper hibachi joint. Don't let the garlic burn, it turns bitter, and that's a sad flavor for this dish. Keep it moving!
- Frying the Rice and Veggies:
- Now, add your day-old cold rice and frozen mixed vegetables to the wok. Break up any clumps of rice with your spatula. Stir-fry for 3-5 minutes, pressing the rice against the hot surface to get some of those crispy bits. This is where the magic happens, getting that slightly toasted texture. I always get a little messy here, rice flying everywhere, but it’s worth it!
- Adding the Flavor Boosters:
- Drizzle in the soy sauce and sesame oil. Stir well to coat all the rice and vegetables evenly. Keep stir-frying for another 2-3 minutes, making sure the sauce is absorbed and everything is heated through. This step always makes my kitchen smell like pure happiness. You'll see the rice start to take on that beautiful, rich color, transforming into a savory fried rice.
- Final Touches and Serve:
- Return the scrambled eggs to the wok. Toss everything together gently. Taste and adjust seasoning if needed maybe a little more soy sauce? Garnish with plenty of fresh green onions. This Hibachi Style Fried Rice Recipe is best served immediately, straight from the wok! It should be steaming, fragrant, and a little crispy, just like you remember.
Making this Hibachi Style Fried Rice Recipe has become one of my favorite kitchen rituals. It’s messy, it’s quick, and the end result is always so satisfying. There’s something so grounding about creating something so delicious from simple ingredients, even with the occasional kitchen chaos. It brings a little bit of that restaurant excitement right into my own home.

Storage Tips for Hibachi Style Fried Rice
Honestly, this fried rice holds up like a champ! I usually make a bigger batch than I need just for the leftovers. Store any cooled fried rice in an airtight container in the refrigerator for up to 3-4 days. Reheating is best done on the stovetop in a skillet with a tiny splash of oil to bring back some of that crispiness. I microwaved it once, and while it was edible, the texture wasn't nearly as good it got a bit dry, so don't do that lol! It's still tasty cold, too, if you're into that sort of thing for a quick desk lunch. Just make sure to cool it quickly before storing.
Hibachi Style Fried Rice Recipe Substitutions
Got a picky eater or missing an ingredient for your Hibachi Style Fried Rice Recipe? No worries, I've been there! For the protein, if you don't have eggs, shredded cooked chicken or shrimp work beautifully. I tried adding tofu once, and it worked, kinda, but make sure it's pressed really well. If you're out of fresh ginger, a tiny pinch of ground ginger can stand in, but honestly, fresh is king for that zing. No mixed veggies? Broccoli florets, corn, or even leftover roasted asparagus can be chopped up and thrown in. I've even used spinach at the very end, and it wilted in nicely. Just remember, the core of this dish is the rice and sauce!
Serving Your Hibachi Style Fried Rice
This Hibachi Style Fried Rice Recipe is a star on its own, but it also plays well with others! I love serving it alongside some simple grilled chicken or shrimp, maybe with a side of steamed broccoli. For a truly authentic experience, pair it with some homemade yum yum sauce seriously, it’s a game-changer. And for a cozy night in? This dish and a good rom-com? Yes please! Sometimes, I just add a fried egg on top for an extra rich touch. It’s comforting enough for a chilly evening but light enough for a casual weeknight dinner, making it a versatile favorite.
The Backstory of Hibachi Style Fried Rice
The "hibachi" style we often think of in restaurants, with the theatrical cooking on a flat-top grill, is actually a Japanese-American invention, a fusion of traditional Japanese cooking with American dining preferences. This Hibachi Style Fried Rice Recipe is my homage to those fun, flavorful evenings. I first encountered it on a family trip, mesmerized by the chef's knife skills and the incredible aromas. While I don't have a giant flat-top in my kitchen (a girl can dream!), recreating those flavors at home brings back so many happy memories. It's a taste of that vibrant culinary experience, right in my own kitchen.
Making this Hibachi Style Fried Rice Recipe has become one of my most cherished kitchen adventures. It's more than just a meal, it's a reminder of good times and the simple joy of cooking. That first bite, with its savory depth and hint of crispiness, always makes me smile. I hope you give this a whirl and find as much joy in it as I do. Please, share your own kitchen tales and how your version turns out!

Frequently Asked Questions about Hibachi Style Fried Rice Recipe
- → Can I use fresh rice for this Hibachi Style Fried Rice Recipe?
Honestly, I wouldn't recommend it. Fresh rice is too moist and will likely turn your fried rice into a sticky, clumpy mess. I've made that mistake more times than I can count! Day-old, cold rice is key for that perfect texture.
- → What if I don't have a wok for this Hibachi Style Fried Rice Recipe?
No wok? No problem! A large, heavy-bottomed skillet or cast-iron pan works perfectly well. Just make sure it’s big enough to give everything room to fry without overcrowding. I use my biggest skillet all the time.
- → How do I get my fried rice to be less soggy?
Ah, the age-old question! Make sure your rice is day-old and cold, and don't overcrowd your pan. Cook in batches if you need to, and ensure your pan is super hot. I used to pile it all in, and it was a soggy disaster for my fried rice.
- → Can I add other proteins to this Hibachi Style Fried Rice Recipe?
Absolutely! Cooked chicken, shrimp, beef, or even tofu would be fantastic additions. Just cook them separately first and add them back in with the eggs at the end. I often throw in leftover grilled chicken for an easy boost.
- → What's the best way to reheat leftovers?
For the best texture, reheat in a hot skillet with a tiny bit of oil. It helps bring back those crispy bits. Microwaving works in a pinch, but it can make the rice a bit dry and less appealing for your Hibachi Style Fried Rice, in my experience.