

Honestly, I still remember the first time I had real, authentic Greek pita bread. It wasn't from a fancy restaurant, but a tiny little hole-in-the-wall place during a trip, and it totally changed my world. Before that, I thought pita was just... pita. You know, the stiff, dry stuff from the grocery store. But this? This was warm, impossibly soft, slightly chewy, and puffed up like a dream. It just whispered, 'You gotta make this at home.' My kitchen, usually a scene of enthusiastic chaos, felt like it needed to master this comforting staple. And after a few 'oops, too dense!' moments, I finally landed on a Homemade Greek Pita Bread recipe that hits all the right notes.
My first attempt at this Homemade Greek Pita Bread was a disaster, to be real. I rushed the rising time, thinking 'eh, it'll be fine.' Nope! They came out flat as pancakes, dense and chewy in the wrong way. My partner, bless his heart, tried to be polite, but even he couldn't hide the look of confusion. I just laughed, dusted myself off, and tried again. That's the beauty of baking, isn't it? Every 'oops' is just a lesson in disguise.
Ingredients for Homemade Greek Pita Bread
Pita Dough Essentials
- All-Purpose Flour: This is the backbone of your Homemade Greek Pita Bread, hon. I've tried fancy bread flours, but good old all-purpose gives that perfect soft yet chewy texture. Don't use anything too low in protein, or your pitas might not puff up as nicely!
- Warm Water: Crucial for waking up that yeast! Think bathwater warm, not hot tub hot. If it's too hot, it'll kill the yeast, too cold, and they'll be sleepy. I usually aim for 105-115°F (40-46°C) just a little warmer than your finger.
- Active Dry Yeast: The magic ingredient that makes your Homemade Greek Pita Bread rise and get all fluffy! Make sure it's fresh, old yeast is a sad, flat pita waiting to happen. I always keep mine in the fridge to extend its life.
- Granulated Sugar: Just a tiny pinch, it's food for the yeast, helping it activate and get bubbly. You won't taste the sweetness, it's just there to kickstart the party.
Flavor & Rise Boosters
- Olive Oil: Ah, the Greek touch! A good quality extra virgin olive oil adds tenderness, flavor, and that slight richness that makes this Homemade Greek Pita Bread so irresistible. Don't use skim milk, just don't this is bread, not a diet food!
- Fine Sea Salt: A non-negotiable! Salt brings out all the flavors and balances the sweetness from the yeast. I once forgot salt, and the pitas tasted bland and sad, like something was missing. Trust me, it matters!
Finishing Touches
- Extra Flour (for dusting): Just a little for dusting your work surface and hands. You want enough so the dough doesn't stick, but not so much that it makes your pitas tough. It's a delicate balance, I know!
Mastering Homemade Greek Pita Bread: Instructions
- Step 1: Wake Up the Yeast!
- Okay, first things first for our Homemade Greek Pita Bread journey! Grab a medium bowl, pour in your warm water, and sprinkle the sugar and yeast over it. Give it a gentle stir. Now, just let it sit for about 5-10 minutes. What you're looking for is a foamy, bubbly top that means your yeast is alive and happy! Honestly, this is where I always get a little thrill, seeing those little bubbles means success is on its way. If it doesn't foam up, your water might have been too cold or too hot, or your yeast is past its prime. No worries, just try again!
- Step 2: Mix the Dough for Homemade Greek Pita Bread
- Once your yeast is frothy, add the olive oil and salt to the bowl. Gradually start mixing in the flour, about a cup at a time. I usually use a wooden spoon at first, but soon enough, my hands get involved it's just more satisfying! The dough will be shaggy and sticky, and you might think 'oops, I messed up,' but don't panic. Just keep mixing until it mostly comes together. This is where the magic starts to happen for our Homemade Greek Pita Bread!
- Step 3: Knead, Knead, Knead!
- Turn the dough out onto a lightly floured surface. Now for the fun part: kneading! Knead for about 8-10 minutes. You're aiming for a smooth, elastic dough. It might feel a bit sticky at first, but resist the urge to add too much extra flour, as that can make your Homemade Greek Pita Bread tough. Just a light dusting if it's really sticking. I find kneading so therapeutic, it's a great way to work out any frustrations, honestly. You'll feel the dough transform under your hands, becoming softer and more pliable.
- Step 4: First Rise (Patience is a Virtue!)
- Lightly oil a clean bowl, place your beautifully kneaded dough in it, and turn it once to coat. Cover the bowl with plastic wrap or a clean kitchen towel. Now, find a warm, draft-free spot and let it rise for 1 to 1.5 hours, or until it has doubled in size. This is crucial for fluffy Homemade Greek Pita Bread! I once put it in a cold spot, and it barely rose total oops moment. A warm oven (turned off, of course!) with the light on works wonders. Go enjoy a cup of coffee or read a book, the dough is doing its thing!
- Step 5: Divide and Shape Your Pita Bread
- Once your dough has risen, gently punch it down to release the air. Turn it out onto a lightly floured surface and divide it into 8-10 equal pieces. Roll each piece into a smooth ball. Now, using a rolling pin, roll each ball into a round about 6-7 inches in diameter and about 1/4 inch thick. Try to keep the thickness even for consistent puffing. Don't worry if they're not perfectly round, mine rarely are! Just focus on the thickness for perfect Homemade Greek Pita Bread.
- Step 6: Second Rise & Cook 'Em Up!
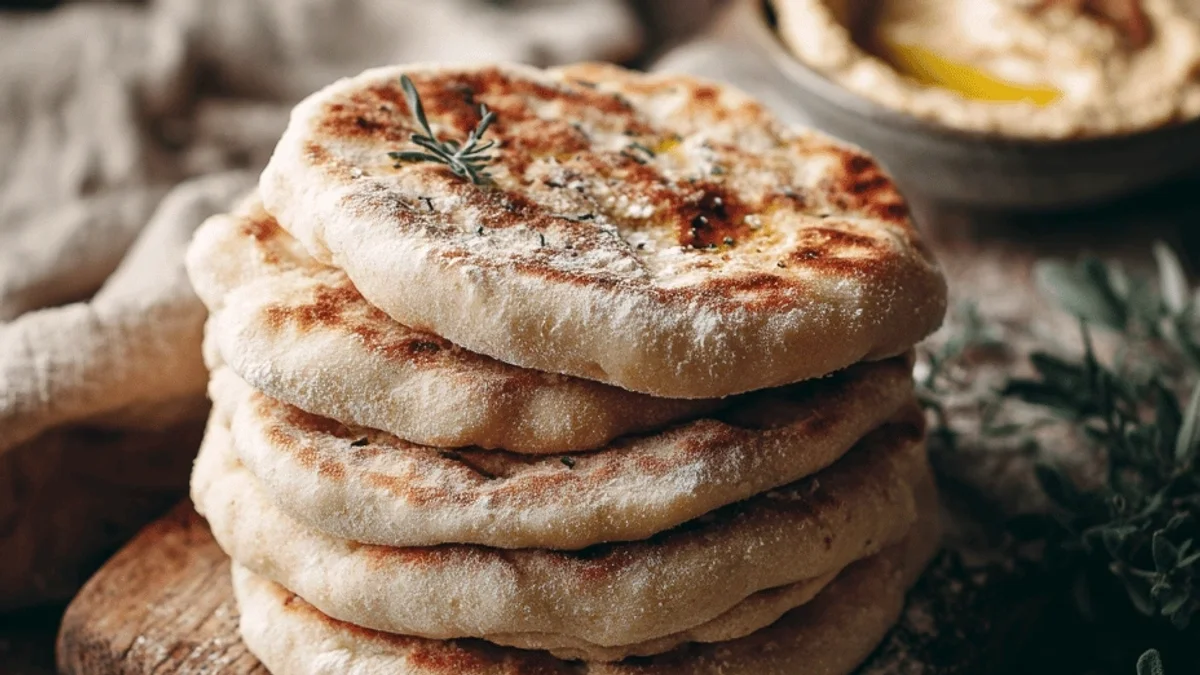
- Place the rolled-out pitas on a lightly floured baking sheet, leaving some space between them. Cover them loosely with a kitchen towel and let them rest for another 15-20 minutes. This second rise helps them puff beautifully. While they're resting, preheat a heavy-bottomed skillet (cast iron is my favorite!) or a griddle over medium-high heat. Once hot, cook each Homemade Greek Pita Bread for 1-2 minutes per side, until they puff up and get lovely golden-brown spots. The smell is absolutely divine at this point, truly heavenly! Stack them on a plate wrapped in a clean towel to keep them warm and soft.
There's nothing quite like pulling a warm, puffy piece of Homemade Greek Pita Bread straight from the pan. The smell fills the kitchen, and it's just pure joy. I remember one time, I had a little bit of dough left over, and I just made a tiny pita for my cat, who, to my surprise, actually nibbled on it! It's those little, unexpected moments of kitchen chaos that make cooking so special, don't you think?
Storing Your Homemade Greek Pita Bread
So, you've got a stack of beautiful Homemade Greek Pita Bread, and you're wondering how to keep them fresh? Trust me, I've had my share of stale bread regrets. My best advice is to let them cool completely after cooking. Once cooled, store them in an airtight container or a Ziploc bag at room temperature. They'll stay wonderfully soft for about 2-3 days. I once left them uncovered on the counter, thinking 'oh, they'll be fine for a few hours,' and oops! They got tough pretty quickly. If you want them to last longer, they freeze beautifully! Just stack them with parchment paper in between, pop them in a freezer-safe bag, and they'll keep for up to 3 months. To reheat, you can quickly warm them in a dry skillet, a toaster oven, or even a microwave (though sometimes the microwave makes them a little chewy, to be honest).

Ingredient Substitutions for Homemade Greek Pita Bread
I'm all about experimenting in the kitchen, and this Homemade Greek Pita Bread recipe is pretty forgiving! If you don't have all-purpose flour, you can try using bread flour, though it might result in a slightly chewier pita. I tried a 50/50 mix with whole wheat flour once, and it worked... kinda. It gave a nice nutty flavor, but they were a bit denser and didn't puff quite as much. Still tasty, just different! If you're out of olive oil, a neutral oil like grapeseed or vegetable oil will work, but you'll lose a bit of that authentic Greek flavor, which, to be real, is a shame. For the yeast, instant yeast can be used directly with the flour, skipping the blooming step, but I still prefer active dry for the ritual of watching it bubble. Don't be afraid to play around, you might discover your new favorite tweak!
Serving Homemade Greek Pita Bread
Oh, the possibilities with Homemade Greek Pita Bread are endless! My absolute favorite way to enjoy it is warm, straight from the pan, with a generous dollop of homemade tzatziki and a sprinkle of fresh dill. It’s heaven! But honestly, it’s the perfect vehicle for so many things. Think classic gyros, loaded with marinated chicken or pork, tomatoes, onions, and more tzatziki. Or use it to scoop up creamy hummus, spicy feta dip (tyrokafteri), or a vibrant baba ghanoush. It’s also amazing torn into pieces for a Greek salad, or as a side for souvlaki. For a cozy night, I love serving it alongside a hearty lentil soup or a lemony chicken dish. And with a crisp, dry white wine or a refreshing iced tea? Yes please! It just elevates any meal, making it feel extra special and comforting.
The Cultural Backstory of Homemade Greek Pita Bread
Homemade Greek Pita Bread isn't just a bread, it's a cornerstone of Greek cuisine and culture, woven into everyday life. Its origins trace back thousands of years, with various flatbreads being staples across the Mediterranean. In Greece, pita (specifically the kind we're making, often called 'pita souvlaki' or 'pita gyro') is more than just a side, it's the edible plate, the wrap, the scooper. It's the comforting base for street food heroes like gyros and souvlaki, which my family discovered on our very first trip to Athens. We were walking through a bustling market, the air thick with the smell of grilling meat and spices, and there it was a vendor handing out warm, fluffy pitas. It was love at first bite! Making it at home connects me to those vibrant memories and the incredible hospitality of Greek culture. It's a taste of history, made fresh in your own kitchen.
Making Homemade Greek Pita Bread from scratch is one of those kitchen triumphs that just makes your heart sing. Watching them puff up, feeling their warmth, and knowing you created something so simple yet so utterly delicious it's incredibly satisfying. Every time I make a batch, I'm transported back to those sun-drenched streets of Greece. I hope you give this recipe a try and create your own amazing memories. Don't forget to share your pita adventures with me, I love hearing about your kitchen chaos and successes!

Frequently Asked Questions About Homemade Greek Pita Bread
- → Why didn't my Homemade Greek Pita Bread puff up?
Oh, I've been there! Usually, it's either your yeast wasn't active enough (check for foam!), your pan wasn't hot enough, or you rolled the dough too thin or too thick. Sometimes it just needs a little more rest time before cooking. Don't worry, even a flat pita tastes good!
- → Can I use whole wheat flour for Homemade Greek Pita Bread?
You totally can, but expect a slightly denser texture and they might not puff as much. I've tried a 50/50 mix, and it worked okay for a healthier twist, but for that classic fluff, stick to mostly all-purpose. Experiment and see what you like!
- → What's the best way to reheat Homemade Greek Pita Bread?
For the best results, a quick warm-up in a dry skillet over medium heat for about 30 seconds per side is perfect. It brings back that fresh-baked feel. A toaster oven works well too! I microwaved it once and it got a bit rubbery, so don't do that lol.
- → Can I make the dough ahead of time for Homemade Greek Pita Bread?
Absolutely! You can prepare the dough up to the first rise, then punch it down, cover it tightly, and refrigerate it for up to 24 hours. Just let it come to room temperature for about 30-60 minutes before dividing and shaping. It's a great meal-prep win!
- → What are some fun variations for Homemade Greek Pita Bread?
I love adding a pinch of dried oregano or garlic powder to the dough for extra flavor! You could also brush them with a little garlic butter after cooking. For a sweet treat, try a sprinkle of cinnamon sugar. The possibilities are endless, so get creative!