

I remember the first time I stumbled upon the idea of Blue Cheese Stuffed Pears. It was a chaotic Tuesday evening, guests were arriving in an hour, and my grand plan for an elaborate appetizer had, well, evaporated. I had these beautiful, ripe pears sitting on the counter and a wedge of blue cheese in the fridge, a leftover from a charcuterie board that never quite happened. A moment of pure panic, then a flash of inspiration! What if I just… put them together? Honestly, I didn't expect much, but the aroma filling my kitchen was incredible. That night, these little elegant bites saved my dinner party and, dare I say, my sanity. They’ve been a special part of my entertaining repertoire ever since.
Oh, the early days of making these Blue Cheese Stuffed Pears! One time, I got a little too ambitious with the pear coring and ended up with a gaping hole right through the bottom. Stuffing went everywhere, it was a mess! Another time, I used pears that were just a bit too soft, and they practically melted in the oven. Live and learn, right? Now, I know exactly what to look for, and I’m here to share those little "oops" moments so you don't have to make the same ones.
Ingredients for Blue Cheese Stuffed Pears
Star Ingredients
- Pears (Bosc or Anjou): These are your canvas! I always pick firm-but-ripe pears, too hard and they won’t soften nicely, too soft and they’ll turn to mush. Bosc or Anjou hold their shape best, honestly.
- Blue Cheese (Gorgonzola or Roquefort): This is where the magic happens. I usually go for a creamy Gorgonzola, but Roquefort brings a sharper punch. Don't skimp here, quality cheese makes all the difference. I once tried a cheap brand, and it just wasn't the same, trust me.
Flavor Enhancers
- Walnuts (chopped): They add a lovely crunch and a nutty depth that really complements the sweet pear and tangy cheese. I toast them lightly first for extra flavor it's a game changer!
- Honey: A drizzle of honey balances the blue cheese's tang and enhances the pear's natural sweetness. Any good quality honey works, but local wildflower honey? Chef's kiss.
- Fresh Thyme (leaves): The earthy, aromatic notes of fresh thyme really elevate this dish. Dried thyme just doesn't do it justice here, in my humble opinion. A little sprig of fresh green makes them look pretty too!
Finishing Touches
- Balsamic Glaze: This isn't strictly necessary, but it adds a beautiful tangy-sweet finish and a gorgeous visual appeal. You can buy it or reduce balsamic vinegar yourself I’ve done both, and the homemade is always worth the effort if you have time.
- Flaky Sea Salt: Just a tiny pinch before serving brings out all the flavors. It’s that little pop of savory that makes you go, "Ah, yes!"
Instructions for Blue Cheese Stuffed Pears
- Prep Your Pears:
- First things first, preheat your oven to 375°F (190°C). Then, wash your pears really well. Now, the delicate part: carefully halve each pear lengthwise and, using a small spoon or melon baller, scoop out the core and a little bit of the flesh to create a cavity. Be gentle, we don’t want any accidental holes through the bottom like I used to make! Place the pear halves cut-side up on a baking sheet lined with parchment paper makes cleanup so much easier, honestly.
- Create the Blue Cheese Stuffing:
- In a small bowl, crumble your blue cheese. Add the chopped walnuts, a generous drizzle of honey, and the fresh thyme leaves. Give it a good mix with a fork until everything is nicely combined. I sometimes add a tiny twist of black pepper here, just because I like a little warmth. This mixture should be chunky but cohesive, smelling incredibly aromatic already, you'll see!
- Stuff the Pear Halves:
- Now for the fun part! Take a spoonful of your delicious blue cheese mixture and carefully mound it into the hollowed-out cavity of each pear half. Don't be shy, really fill them up! You want a good balance of pear and stuffing in every bite. This is where you can get a bit messy, and that's perfectly fine. My kitchen often looks like a cheese explosion at this stage, ha!
- Bake Your Blue Cheese Stuffed Pears:
- Pop that baking sheet into your preheated oven. Bake for about 18-20 minutes, or until the pears are tender when pierced with a fork and the blue cheese is gloriously melty and slightly bubbly. The edges of the pears might even get a little caramelized, which is exactly what we’re aiming for. Keep an eye on them, as oven temperatures can vary wildly!
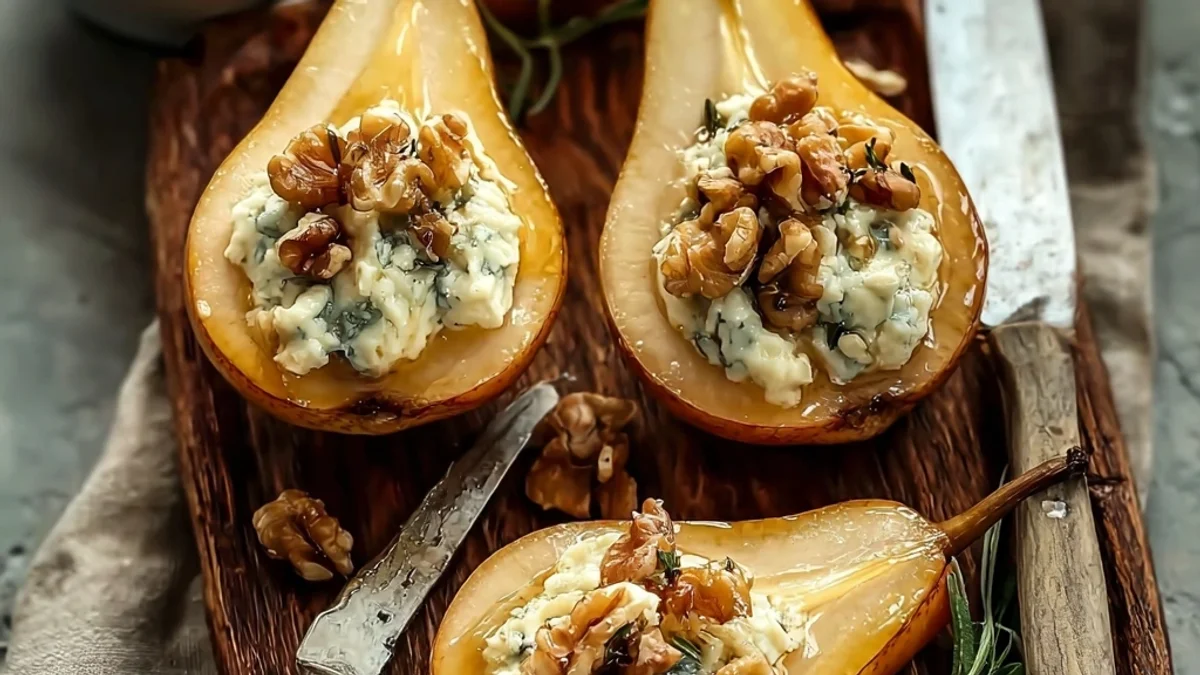
- Garnish and Serve:
- Once they’re out of the oven, let your stuffed pears cool for just a minute or two they'll be piping hot! Transfer them carefully to a serving platter. This is where the presentation really comes in. A final drizzle of balsamic glaze over each pear and a sprinkle of flaky sea salt makes them look and taste absolutely restaurant-worthy. You'll be so proud, I promise!
- Enjoy This Elegant Appetizer:
- These are best served warm, allowing that beautiful contrast between the soft, sweet pear and the creamy, tangy blue cheese to really shine. The crunch of the walnuts and the hint of thyme are just perfect. Every bite is a little explosion of flavor, and honestly, they disappear fast at my house. Watch them go!
Making these Blue Cheese Stuffed Pears always brings a smile to my face. It’s one of those recipes that feels a bit fancy but is so forgiving. I remember one time, the doorbell rang just as I was taking them out, and I completely forgot the balsamic glaze. My guests still raved about them! It just goes to show, sometimes the simplest things, made with a little love, are the best.
Storage Tips for These Stuffed Pears
Honestly, these stuffed pears are best enjoyed fresh and warm from the oven. The texture of the pear and the melty cheese is just divine then. If you do have leftovers (which is rare in my house, lol), you can store them in an airtight container in the refrigerator for up to 2 days. I've tried reheating them in the microwave once, and the pear got a bit watery, and the cheese lost its nice texture so don't do that. A gentle reheat in a toaster oven or regular oven at 300°F (150°C) for about 5-7 minutes works much better to crisp them up and re-melt the cheese without making the pears too soft. They won't be quite as good as fresh, but still tasty!

Blue Cheese Stuffed Pears: Ingredient Substitutions
Life happens, and sometimes you don’t have everything on hand! For the pears, while Bosc or Anjou are my favorites for these Blue Cheese Stuffed Pears, Bartlett or Comice could work, but watch their tenderness as they soften faster. As for the blue cheese, if Gorgonzola isn’t your jam, a creamy feta or even a soft goat cheese could be interesting. I tried goat cheese once, and it gave a tangier, less pungent flavor, which was actually quite lovely. If walnuts aren't available, pecans or even pistachios would be fantastic for that crunch. No fresh thyme? A tiny pinch of dried rosemary or sage could offer a different, but still earthy, vibe, though fresh is truly best here. And if you're out of honey, a tiny bit of maple syrup could also work in a pinch.
Serving Suggestions for Blue Cheese Stuffed Pears
These Blue Cheese Stuffed Pears are incredibly versatile! They shine as a sophisticated appetizer on their own, perhaps alongside a glass of crisp white wine like a Sauvignon Blanc or a light-bodied red. For a more substantial offering, I love serving them with a simple green salad dressed with a light vinaigrette the freshness cuts through the richness beautifully. They also make a fantastic addition to a cheese board, adding a warm, sweet element. Honestly, I’ve even had them as a light dessert with a scoop of vanilla bean ice cream (don't knock it till you try it!). A cozy night in with these and a good book? Yes please!
Cultural Backstory of Stuffed Pears
While the specific Blue Cheese Stuffed Pears recipe might feel modern, the idea of combining fruit and cheese has roots that go way back, especially in European culinary traditions. Pears and cheese, particularly blue cheese, are a classic pairing in France and Italy, often served as a dessert course or a light appetizer. The sweetness of the fruit beautifully balances the savory, pungent notes of the cheese. My personal connection to this tradition started on a trip to Italy, where I saw a simple dish of pears and gorgonzola on almost every menu. It was so elegant in its simplicity. This recipe is my little homage to that timeless combination, bringing a warm, baked twist to a beloved classic.
So there you have it, my dear friends. These Blue Cheese Stuffed Pears are more than just a recipe, they’re a little piece of my kitchen journey, born from a moment of panic and now a firm favorite. They’re proof that sometimes the simplest ideas, combined with quality ingredients, create the most memorable dishes. I truly hope you give them a try and make them your own. Don’t forget to tell me how your batch turns out!

Frequently Asked Questions
- → Can I make these stuffed pears ahead of time?
You can prep the pears and the stuffing mixture separately up to a few hours in advance. Just keep them chilled. Assemble and bake right before serving for the best texture. I tried assembling too early once, and the pears started to brown a bit!
- → What if I don't like blue cheese?
No worries! As I mentioned, a creamy goat cheese or even a good quality feta would make a delicious alternative. I've experimented with both, and while different, they still create a lovely sweet and savory bite.
- → How do I know when the pears are perfectly tender?
Gently pierce the thickest part of the pear with a fork. It should slide in with a little resistance but not be mushy. It’s a delicate balance, and I've definitely overcooked a few in my time!
- → Can I freeze leftovers?
I wouldn't recommend freezing these, honestly. The texture of the pears becomes very watery and unappealing after thawing and reheating. They really are best enjoyed fresh or within a day or two from the fridge.
- → Can I add other ingredients to the stuffing?
Absolutely! I've seen people add dried cranberries for extra sweetness or a pinch of chopped prosciutto for a salty, savory kick. My kitchen is all about experimenting, so go for it and see what you love with these!